
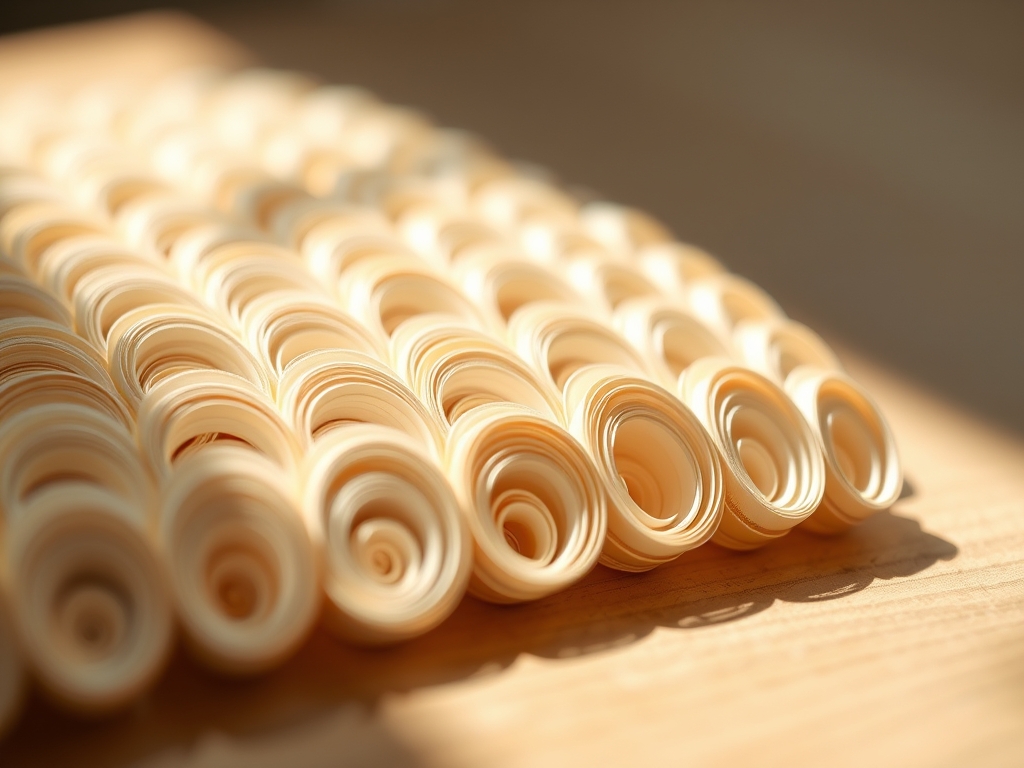
Listen to the snap of the paper. That crisp, rhythmic sound is the heartbeat of your studio. When you dive into Repetitive Paper Quilling, you are not just rolling strips; you are managing the structural integrity of cellulose fibers. You can feel the tension in your fingertips as the paper resists the curl. It wants to stay flat, but you are teaching it a new geometry. This craft is the ultimate marriage of physics and patience. By repeating the same tight coils or loose scrolls hundreds of times, you create a visual frequency that resonates with the human eye. We are talking about high density art where the shadow play is just as important as the paper itself. It is tactile, it is addictive, and it is going to transform how you look at a simple sheet of cardstock. Grab your slotted tool and clear your desk. We are about to turn a stack of two dimensional strips into a three dimensional floral masterpiece that defies the laws of gravity and boredom.
THE STUDIO KIT
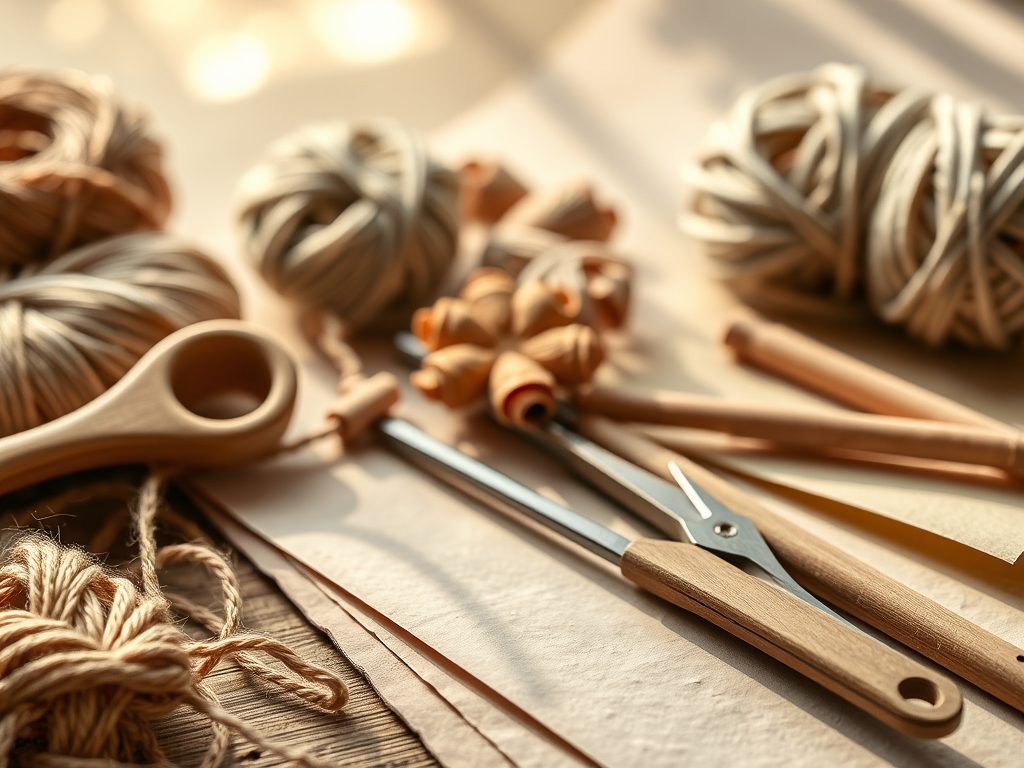
To master Repetitive Paper Quilling, your kit must prioritize precision over quantity. Start with a slotted quilling tool featuring a hardened steel tip to prevent the metal from bowing under the pressure of high density coils. You will also need a precision tip glue applicator to manage the capillary action of your adhesive. If the glue is too viscous, it will warp the paper; if it is too thin, the bond will fail. Use a fine point awl for adjusting the internal spirals of your coils and a digital caliper to ensure every strip is exactly 3mm or 5mm in width.
The paper itself is your primary engineering material. Look for a basis weight of 80lb to 100lb text weight paper. This provides the necessary tensile strength to hold a curve without snapping. If you are looking for Material Substitutions, you can use high quality construction paper, but be warned that the lower fiber density will result in a "fuzzier" edge when cut. For a premium finish, use acid free, lignin free strips to prevent yellowing over time. A bone folder is essential for pre-stressing the paper fibers before you begin the winding process, ensuring a smooth, kink free arc.
THE TEMPO
The "Maker's Rhythm" is a psychological state where your hands move faster than your internal monologue. In Repetitive Paper Quilling, timing is everything. You should allocate approximately forty percent of your time to material preparation. This includes cutting strips and sorting them by color gradient. The actual rolling phase is the bulk of the work, taking about fifty percent of the project duration. The final ten percent is dedicated to the structural assembly, where you bond the individual components into a cohesive 3D floral design.
Expect a single intricate flower to take anywhere from two to four hours. Because this is a repetitive process, your speed will increase as your muscle memory develops. You will find that after the first fifty coils, your hands instinctively know the exact torque required to achieve a uniform diameter. Do not rush the drying phase. Allow at least twenty minutes for the primary structure to set before you attempt to mount it vertically. This ensures the structural integrity of the base is not compromised by the weight of the petals.
THE CORE METHOD
1. The Foundation Coil
Every floral design begins with a core. You must anchor the paper strip into the slot of your tool and rotate with consistent tension. If the tension fluctuates, the coil will develop "telescoping" issues where the center pushes outward.
Mastery Tip: Understand the tensile strength of your paper. By applying a slight tug as you rotate, you compress the air gaps between layers, increasing the structural density of the coil. This makes the final piece resistant to humidity and physical deformation.
2. The Teardrop Petal
To create a teardrop, you first create a loose circle. Use a circle sizing template to ensure every petal in your Repetitive Paper Quilling project is identical. Once the circle is released, pinch one end firmly between your thumb and forefinger.
Mastery Tip: This pinch point creates a stress concentration in the paper fibers. By burnishing the crease with your fingernail or a bone folder, you permanently realign the cellulose molecules, ensuring the petal maintains its shape even under the weight of additional 3D layers.
3. The Marquise Leaf
The marquise is the workhorse of floral quilling. It is created by pinching a loose coil on two opposite sides simultaneously. This creates a symmetrical lens shape that is perfect for building out dense, repetitive foliage.
Mastery Tip: Use the principle of triangulation when placing these leaves. By overlapping the points of the marquise shapes, you create a truss like structure that reinforces the entire 3D arrangement, making it much more durable than a single layer design.
4. The Fringed Center
For a realistic floral texture, take a wider strip of paper and use precision scissors to cut fine vertical lines along the length, leaving a small margin at the bottom. Roll this fringed strip around a tight center coil.
Mastery Tip: This technique utilizes surface area expansion. When you peel back the fringe, you are increasing the visual volume of the piece without adding significant weight. Use an awl to gently curve the fringe tips outward, mimicking the natural growth patterns of real botanical life.
5. The 3D Layering
This is where the magic happens. Instead of gluing your shapes flat on a page, you will glue them at an angle or stack them. Use a high tack adhesive to create a bridge between the thin edges of the paper strips.
Mastery Tip: Pay attention to capillary action. A tiny drop of glue will pull itself into the gaps between the paper layers. If you use too much, the moisture will soften the paper and cause the 3D structure to collapse. Aim for a "dry bond" where the glue sets almost instantly upon contact.
THE TECHNICAL LEDGER
Maintenance & Longevity: To keep your 3D art pristine, avoid direct sunlight which can break down the chemical bonds in the paper dyes. Use a soft makeup brush or a pressurized air canister to remove dust. Never use water or liquid cleaners, as the porous nature of the paper will absorb the moisture and ruin the shape.
Material Variations: For a sustainable approach, use recycled 24lb bond paper. It is thinner and requires more layers to achieve the same gauge, but it offers a unique matte texture. For a luxury finish, use metallic edged strips which add a reflective quality to the "valleys" of your repetitive coils.
The Correction:
- Unraveling Coils: If your coil pops open, your glue was likely too dry. Re-moisten the area and hold with a cross-locking tweezer for 30 seconds.
- Asymmetrical Petals: This happens when the internal spiral is not centered. Use an awl to manually shift the center of the coil before you apply the final pinch.
- Glue Spots: If you see shiny residue, you are over-applying. Use a scrap piece of paper to "wick" away excess glue before it cures.
Studio Organization: Store your finished components in a partitioned plastic box. This prevents the delicate 3D edges from crushing. Label each section by color and shape to streamline the assembly of your Repetitive Paper Quilling projects.
THE FINAL REVEAL
Look at that! You have successfully manipulated the physical properties of paper to create a stunning, high density floral sculpture. The way the light catches the edges of those repetitive marquise leaves creates a depth that a flat drawing could never achieve. Your hands might be a little tired, but the visual payoff is immense. You have mastered the Maker's Rhythm and turned a simple stack of strips into a complex, three dimensional ecosystem. This is not just a craft; it is an engineering feat in miniature. Display it proudly, because the level of detail you have achieved is nothing short of professional grade.
STUDIO QUESTIONS
Why is my paper cracking when I roll it?
This usually indicates low moisture content or poor grain direction. Try pulling the strip over a bone folder to break the stiffness of the fibers before rolling. This pre-stresses the paper for a smoother curve.
What is the best glue for 3D quilling?
A polyvinyl acetate (PVA) glue is best. It has a high solid content and low water volume, which prevents the paper from warping while providing a strong, flexible bond that supports the structural integrity of 3D art.
How do I make my coils look identical?
Use a circle sizing template or a quilling board. After rolling the coil, place it in the desired diameter hole and let it expand. This ensures every repetitive element has the exact same geometric footprint.
Can I quill with regular printer paper?
Yes, but it has lower tensile strength than dedicated quilling paper. You may need to use longer strips to achieve the same thickness, and the edges may be more prone to tearing under high torque during the rolling process.

