
Your fingers graze the starched surface of the mono canvas; it feels crisp, almost musical, like a drumhead waiting for the first beat. This is not just a hobby. It is a mechanical meditation where the tensile strength of the mesh meets the soft, multi-ply embrace of wool. When you open one of our Rhythmic Needlepoint Kits, you are holding a blueprint for structural harmony. The weave is perfectly square, maintaining a consistent gauge that ensures your stitches never warp or pull the fabric out of alignment. We are looking for that sweet spot where the needle glides through the intersection without snagging the vertical or horizontal threads. It is about the friction between the fiber and the hole. You can feel the quality in the weight of the tapestry needle; it is smooth, nickel-plated, and designed to move with zero resistance. We are about to turn a blank, porous grid into a dense, colorful masterpiece that feels as sturdy as a woven rug but as intricate as a piece of fine jewelry. Let us get your workspace ready for some serious fiber physics.
THE STUDIO KIT
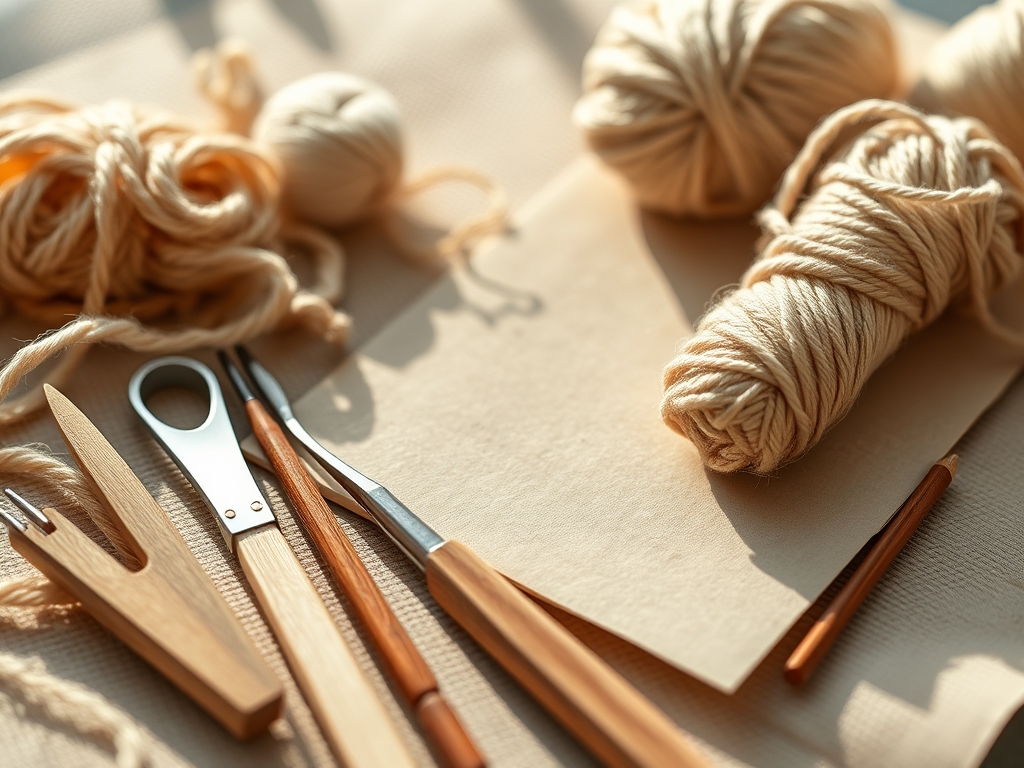
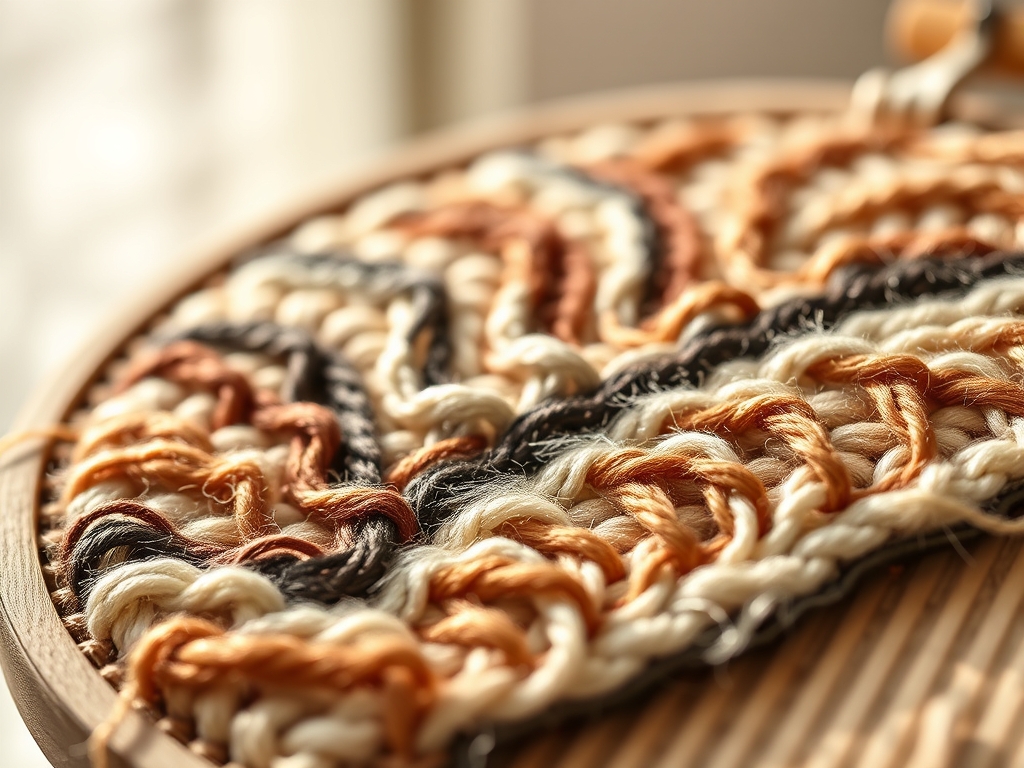
Inside your studio setup, the most critical component is the interlock mono canvas. Unlike traditional needlepoint fabric, interlock uses a twist in the vertical threads to lock the horizontal threads in place, preventing the fabric from shifting under high tension. You will also find a range of tapestry wool, which is a four-ply yarn specifically engineered for its elasticity and ability to cover the canvas completely without leaving "holidays" or gaps. For precision, we use a size 22 or 24 tapestry needle; the blunt tip is essential because it avoids piercing the canvas threads, ensuring the structural integrity of the mesh remains intact.
If you are looking for Material Substitutions, you can swap the standard wool for a silk and ivory blend if you want a higher sheen and lower friction coefficient. For a more rugged, matte finish, a high-quality cotton perle works beautifully, though it lacks the natural "bloom" of wool that fills the canvas holes so efficiently. Professional makers often keep a pair of micro-tip embroidery scissors and a laying tool nearby. A laying tool, which looks like a long, tapered metal spike, is used to keep the threads flat and untwisted as they lay against the canvas, maximizing light reflection and surface smoothness.
THE TEMPO
The "Maker's Rhythm" is a calculated sequence of movements that balances speed with geometric precision. For a beginner, the initial setup phase takes about thirty minutes. This involves binding the edges of your canvas with artist tape to prevent fraying and mounting it onto a scroll frame or stretcher bars. Using a frame is non-negotiable if you want to maintain a perfectly square finished piece; it manages the torque applied by your stitches so the canvas does not "skew" into a parallelogram shape.
Once you start stitching, you will enter the flow state. A standard five-by-five inch design typically requires twelve to fifteen hours of active stitching time. You should aim for a "cadence" of about four stitches per minute. This pace allows you to monitor the thread tension constantly. If you pull too hard, you distort the mesh; if you are too loose, the wool will snag and pill over time. The finishing phase, including blocking and damp-stretching the piece to restore its original dimensions, takes another twenty-four hours of drying time.
THE CORE METHOD
1. Mounting the Canvas
Begin by securing your canvas to the frame. Use a staple gun or tacks to pull the fabric taut across the wooden bars. The goal is to achieve a "drum-tight" surface. This high tension prevents the canvas from sagging as you add the weight of the wool, which can actually increase the overall mass of the fabric by forty percent.
Mastery Tip: This process relies on uniform stress distribution. If one corner is tighter than the others, the diagonal pull will create a permanent ripple in the mesh that no amount of blocking can fix later.
2. Thread Preparation and The Away Knot
Measure a length of wool no longer than eighteen inches. Any longer, and the constant friction of the wool passing through the porous canvas will cause the fibers to break down and thin out, a process known as "shredding." Use an "away knot" to start, placing a temporary knot on the surface of the canvas about two inches from your starting point.
Mastery Tip: The away knot uses frictional resistance to hold the tail in place on the underside. As you stitch toward the knot, you cover the tail, locking it into the structure without creating a bulky lump.
3. The Tent Stitch Execution
The most common move in Rhythmic Needlepoint Kits is the Continental or Basketweave stitch. Work in diagonal rows to prevent the canvas from distorting. Insert the needle from the back to the front, then down through the hole diagonally opposite.
Mastery Tip: The Basketweave stitch creates a heavy "padded" back. This increases the dimensional stability of the piece, making it much more durable for use as a pillow or upholstery than a simple half-cross stitch.
4. Managing Thread Twist
As you stitch, the needle naturally rotates in your fingers, adding "twist" to the wool. Every few minutes, let your needle hang freely to allow the thread to unwind.
Mastery Tip: This manages the torsional strain on the fiber. An over-twisted thread will appear thinner and leave gaps in the canvas, while a neutral-twist thread "blooms" to provide maximum coverage.
5. The Final Burial
To finish a thread, run the needle under at least four existing stitches on the back of the work. Cut the excess flush with the surface using your rotary cutter or precision snips.
Mastery Tip: This relies on surface area contact. The more stitches the tail passes under, the more friction holds it in place, ensuring the piece won't unravel even under heavy use.
THE TECHNICAL LEDGER
Maintenance & Longevity: Needlepoint is a legacy craft. To preserve the pigment stability of the wool, keep the finished piece out of direct UV light. If the piece becomes dusty, use a vacuum with a mesh screen over the nozzle to gently lift debris without disturbing the fibers.
Material Variations:
- Sustainable: Organic wool dyed with plant-based pigments.
- Recycled: Canvas made from post-consumer polyester mesh.
- Premium: Hand-painted canvases on 18-mesh Zweigart mono canvas for extreme detail.
The Correction:
- The Gap: If canvas shows through, your ply count is too low. Solution: Add a strand of matching silk to the needle to increase the volume.
- The Warp: If the canvas is slanted, you stitched with too much tension. Solution: Use a blocking board and stainless steel T-pins to wet-stretch the piece back to 90-degree angles.
- The Snag: If a loop pulls up, do not cut it. Use a fine-point awl to gently massage the thread back into the surrounding stitches from the reverse side.
Studio Organization: Store your Rhythmic Needlepoint Kits in a cool, dry environment. Use acid-free tissue paper to wrap the canvas and store it flat in a polypropylene bin. Never fold a needlepoint canvas; the creases can snap the stiffening sizing in the mesh, creating permanent structural weak points.
THE FINAL REVEAL
There is nothing quite like the moment you unmount your finished design from the frame. The once-stiff canvas is now a supple, heavy textile, vibrating with color and texture. The tactile feedback of a completed kit is incredibly satisfying; it has a weight and density that feels expensive and permanent. You have successfully navigated the physics of fiber and the geometry of the grid. Your stitches are uniform, your edges are crisp, and the "rhythm" of your work is visible in every perfectly placed loop of wool. It is a masterpiece of your own making!
STUDIO QUESTIONS
What is the best gauge for a beginner?
A 13-mesh or 14-mesh canvas is ideal. The holes are large enough to see clearly without a magnifying lamp, and the stitching progresses quickly, providing immediate visual feedback and maintaining the maker's momentum.
Why does my wool keep fraying?
Fraying is usually caused by excessive thread length. The constant friction of the wool passing through the starched canvas act like sandpaper. Keep your strands under 18 inches to maintain the fiber's tensile integrity.
Can I wash my needlepoint kit?
Never machine wash. If necessary, spot clean with cold water and a pH-neutral detergent. Always test for colorfastness first, as some hand-painted canvases or dyed wools may bleed when saturated.
How do I stop my canvas from curling?
Use a stretcher bar frame. By tacking the canvas to a rigid wooden square, you counteract the natural "pull" of the diagonal stitches, ensuring the finished piece remains flat and structurally sound.

