
The crisp snap of a fresh sheet of 80 gsm paper is the ultimate siren song for a maker. When you sit down at your workbench, you are not just playing with scraps; you are engaging in the rhythmic architecture of repetitive paper folding. It is a tactile conversation between your fingertips and the cellulose fibers of the page. You can feel the grain direction resisting or yielding under your touch as you prep your first square. We are diving deep into the world of modular kusudama, where eight identical units transform from flat planes into a structural masterpiece. This process is hypnotic. It is about the muscle memory of the crease and the mathematical satisfaction of seeing a pile of loose components snap together into a rigid, self-supporting geometry. Forget flimsy crafts. We are building a high-tensile paper sculpture that relies on friction and interlocking tabs to defy gravity. Grab your favorite beverage and clear your desk; we are about to turn a stack of squares into a three-dimensional marvel through the sheer power of repetition and precision.
THE STUDIO KIT

To master repetitive paper folding, your toolkit must prioritize precision and edge retention. You will need eight squares of dual-sided origami paper, preferably with a weight between 60 and 90 gsm. Paper with a high tensile strength is essential because we will be burnishing the folds multiple times; cheap pulp will tear under the pressure of a heavy crease.
A teflon bone folder is your best friend here. Unlike plastic, teflon will not leave a shiny "glaze" on your paper fibers when you apply pressure. You should also have a stainless steel ruler with a non-slip cork backing for checking your square dimensions; even a half-millimeter deviation will compound over eight units and ruin your final alignment. For those who want to get technical, a pair of digital calipers can help ensure your paper thickness is consistent across the batch.
Material Substitutions: If you cannot find traditional washi, look for kraft paper or high-quality gift wrap. Avoid construction paper; its short fiber length makes it too brittle for the complex interlocking required in modular units. If you are feeling adventurous, parchment paper offers a beautiful translucency, though its low porosity makes it slippery to handle.
THE TEMPO
The "Maker's Rhythm" is a real psychological state where your hands move faster than your conscious thought. For this eight-unit project, expect to spend about 45 minutes at the bench.
The Preparation Phase takes 5 minutes: this is where you inspect your paper for grain direction and ensure every square is perfectly true. The Folding Phase is the bulk of the work, taking roughly 25 minutes. This is the heart of repetitive paper folding. You will find that unit one takes three minutes, but by unit eight, you will be finishing in ninety seconds. The final Assembly Phase requires 15 minutes of high-focus work. This is where you manage the tension of the interlocking tabs. Do not rush the assembly; the structural integrity of a kusudama depends on the slow, deliberate seating of each flap into its corresponding pocket.
THE CORE METHOD
1. Establishing the X-Axis
Start by folding your square in half diagonally to create a sharp valley fold. Align the corners using a tacking motion before sliding your finger to the center and pushing outward. This prevents the paper from "shingling" or shifting out of alignment. Use your bone folder to burnish the crease until it is razor-sharp.
Mastery Tip: This initial fold breaks the surface tension of the paper. By compressing the cellulose fibers along this line, you create a permanent hinge that dictates the accuracy of every subsequent move.
2. The Blintz Foundation
Fold all four corners into the center point where your diagonal creases intersect. This creates a smaller, reinforced square with four triangular flaps. Ensure that the points do not overlap; a tiny gap of 0.5mm is actually preferable to allow for the ply thickness of the paper when the unit is eventually folded shut.
Mastery Tip: This step utilizes geometric centering. If your points are off, the center of gravity for the entire modular unit shifts, which causes the final kusudama to look lopsided or "torqued."
3. Creating the Locking Flaps
Turn the paper over and fold the side edges toward the center vertical axis. This creates a narrow rectangular shape with "hidden" pockets on the underside. These pockets are the mechanical housing for the assembly phase. Use your stylus or awl to gently open the pockets if the paper is sticking due to static or tight fibers.
Mastery Tip: This increases the structural rigidity of the unit. By layering the paper, you are essentially creating a laminated beam that can resist the compressive forces applied during the final interlocking.
4. The Parallelogram Shift
Fold the top right corner down and the bottom left corner up to create a slanted, parallelogram shape. This step defines the "gender" of your module. In repetitive paper folding, every single unit must be folded in the exact same direction. If you flip one, the symmetry breaks and the units will not nest.
Mastery Tip: This introduces torsional stress to the unit. The paper "wants" to spring back to a flat state; we will use this stored kinetic energy to keep the final model locked together without glue.
5. Final Crease Sharpening
Fold the protruding triangular flaps backward to create a clean diamond shape. Run your bone folder over every edge one last time. The goal is to minimize the bulk-to-surface ratio. The thinner and flatter your units are, the easier they will slide into one another.
Mastery Tip: Sharp creases act as mechanical stops. When the units are assembled, these crisp edges provide the friction necessary to prevent the tabs from sliding out of the pockets under their own weight.
THE TECHNICAL LEDGER
Maintenance & Longevity
Paper is a biological material sensitive to hygroscopy. To keep your kusudama from warping, keep it away from high-humidity areas like kitchens or bathrooms. If the model begins to sag, you can "reset" the tension by gently pressing the joints inward. For long-term display, a light mist of matte fixative can seal the pores and prevent moisture absorption.
Material Variations
- Sustainable: Use 100% post-consumer recycled paper. It has a shorter fiber length, so avoid "over-burnishing" which can lead to cracking.
- Premium: Tant paper is dyed all the way through the pulp, meaning no white edges will show at your creases. It has a slightly "toothy" texture that provides excellent friction for locking.
The Correction
- The Gap: If the center of your kusudama has a hole, your "Blintz" folds were not deep enough. Fix: Re-fold the units, ensuring the points hit the exact center.
- The Pop-Out: If a unit keeps sliding out, the pocket is too loose. Fix: Use a bone folder to "crimp" the pocket edge, increasing the friction.
- The Tear: If the paper splits at a corner, you used too much pressure. Fix: Apply a tiny amount of archival pH-neutral glue with a toothpick to the underside of the tear.
Studio Organization
Store your unfinished units in a press or a heavy book. This keeps them flat and prevents the "memory" of the paper from expanding before you are ready for assembly. Label your batches with the paper weight and date to ensure consistency if you take a break.
THE FINAL REVEAL
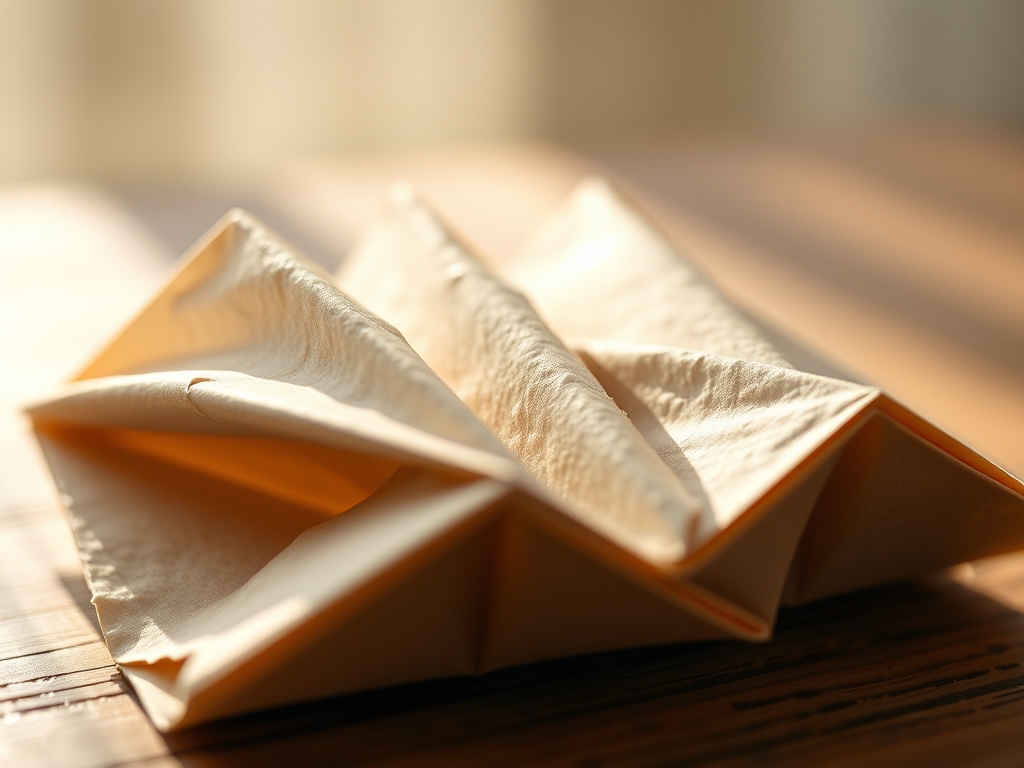
Look at that! You have successfully navigated the physics of repetitive paper folding. Your eight units have transitioned from chaotic scraps into a sophisticated, interlocking star. The way the light hits the faceted surfaces creates a beautiful play of highlights and shadows. There is a profound sense of achievement in knowing that no adhesives are holding this together; it is purely the result of your precision and the natural friction of the paper. Your kusudama is a testament to the "smart" side of crafting, where math meets art in a perfectly balanced dance.
STUDIO QUESTIONS
What is the best paper weight for modular folding?
The ideal weight is 60 to 90 gsm. This range provides enough tensile strength to hold a crease without being so thick that the overlapping layers become unmanageable during the final assembly.
Do I need glue for a 8-unit kusudama?
No; true modular origami relies on friction and tension. If your folds are sharp and your measurements are precise, the units will lock together mechanically without the need for external adhesives.
Why do my units look different from each other?
This is usually due to compounded error. If your initial squares are even 1mm off, or if you fold with the grain on some and against it on others, the units will vary in size and shape.
Can I use magazine pages for this?
Yes; magazine paper is often coated and thin, which makes for very sleek units. However, the ink can sometimes crack at the creases, so fold gently to avoid exposing the white interior fibers.
How do I stop the paper from tearing?
Avoid over-working the same crease. Use a bone folder for a single, firm pass rather than multiple aggressive rubs. This preserves the integrity of the cellulose fibers and prevents the paper from becoming brittle.

