
Grab your favorite mug and clear some space because we are about to dive into the tactile world of plant physics. There is nothing quite like the smell of damp willow; it is earthy, sweet, and carries the scent of a riverbank right into your studio. When you pick up these eight flexible stems, you are not just holding sticks. You are holding high-tensile organic fibers that are ready to be transformed through the art of rhythmic basketry weaving. This specific technique relies on the natural elasticity of the Salix genus to create a structural vessel that balances tension and compression. As you slide the first weaver over the vertical stakes, you will feel that subtle resistance. It is a conversation between your hands and the cellulose fibers. We are looking for that perfect flow state where the repetition of the weave becomes second nature. If you have ever wanted to master a craft that feels like a dance for your fingers, you have found it. Let us get our hands dirty and build something beautiful.
THE STUDIO KIT
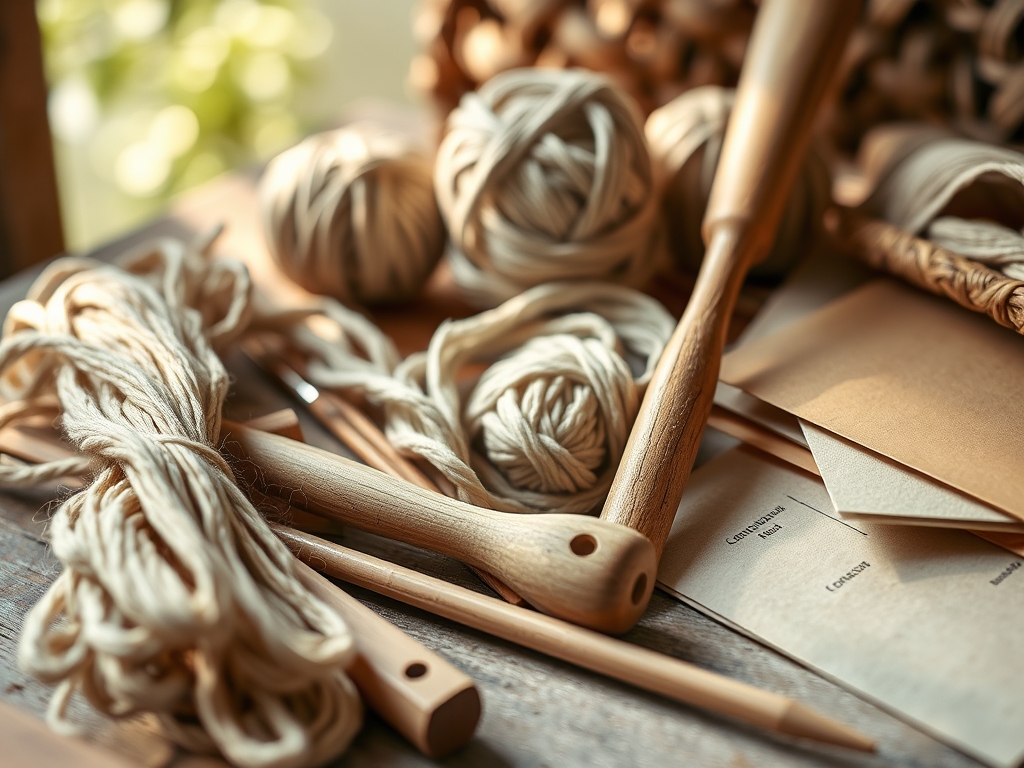
To master rhythmic basketry weaving, you need a kit that respects the organic integrity of the wood. Your primary material consists of eight primary willow rods, ideally harvested in the dormant season to ensure maximum sugar content and flexibility. You will also need a sharp pair of bypass pruners for clean, crush-free cuts that preserve the vascular bundles of the stem. A stainless steel bodkin or a heavy-duty awl is essential for creating space between tight weaves without snapping the fibers. I also recommend keeping a digital caliper nearby to measure the diameter of your stakes; consistency is the secret to a symmetrical basket.
For the soaking process, a galvanized trough is the professional choice, as it allows the stems to hydrate without leaching tannins into a porous surface. If you cannot find willow, your material substitutions include rattan reed or even stripped dogwood branches. Rattan is more porous and requires less soaking time, whereas dogwood offers a higher snap-risk due to its denser grain structure. Always keep a spray bottle filled with distilled water to maintain the moisture levels of your weavers as you work. This prevents the bark from checking or cracking under high-stress bends.
THE TEMPO
The maker's rhythm is not just a poetic concept; it is a chronological framework that dictates the success of your piece. Phase one is the hydration cycle, which takes approximately twenty-four hours for dried willow. You are waiting for the fibers to reach a state of semi-saturation where they can be bent 90 degrees without fracturing. Once you begin the actual rhythmic basketry weaving, expect to spend about three hours on the base and sides. This is where the tempo becomes critical. You must maintain a steady pace to ensure the tension remains uniform across the entire circumference.
If you stop for too long, the willow will begin to lose its moisture, leading to uneven shrinkage as the piece dries. The final phase is the rimming and tidying, which takes about forty-five minutes. This requires a slower, more deliberate cadence to tuck the ends securely. Total active crafting time sits around four to five hours, but the internal clock of the willow dictates the overall schedule. Respect the wood, and it will hold the shape you give it for decades.
THE CORE METHOD
1. The Slath Cross
We start with the foundation, known as the slath. Take four of your thickest rods and pierce them through the center using your awl to create a vertical slit. Thread the remaining four rods through this opening to create a cross shape. This creates a mechanical lock that utilizes the shear strength of the willow. Mastery Tip: This step relies on the tensile strength of the fibers; if the wood splits too far, the structural integrity of the base is compromised. Ensure your awl is lubricated with a bit of beeswax for a smoother entry.
2. Pairing the Base
Take two thin weavers and insert them into the slath. You will use a pairing weave, which involves crossing the two weavers over each other between every stake. This creates a friction-based lock that prevents the base from wobbling. Mastery Tip: Observe the torque you apply to each twist. Excessive force can cause the weavers to kink, which disrupts the capillary action of the wood and makes it brittle as it cures.
3. Staking Up
Once your base reaches the desired diameter, it is time to transition from horizontal to vertical. Insert eight new upright stakes alongside the base rods and bend them upward. This is the most physically demanding part of rhythmic basketry weaving. Mastery Tip: Use the fulcrum of your thumb to guide the bend. This distributes the pressure across a wider surface area of the stem, preventing the outer bark from snapping under the sudden increase in tension.
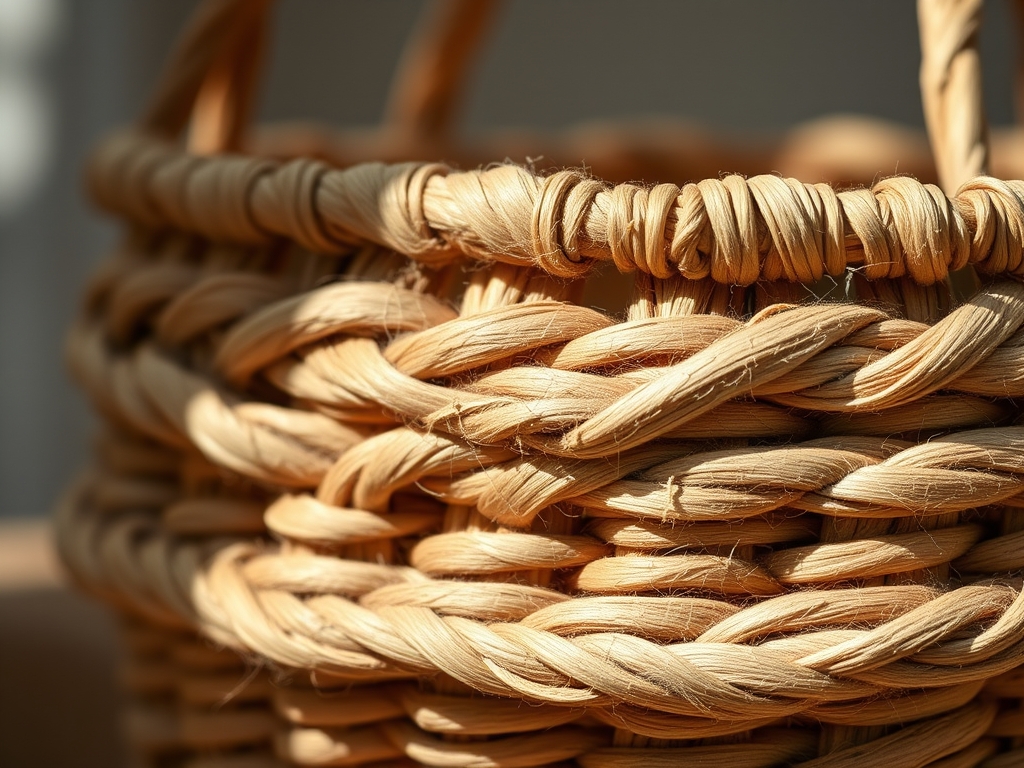
4. The Continuous Rand
Now we enter the rhythmic flow. Take a single long weaver and pass it in front of one stake and behind the next. Repeat this in a continuous spiral. This is where the "rhythm" truly happens. Mastery Tip: Maintain a consistent angle of ascent. If your weaver is too steep, you will create gaps; too shallow, and the walls will bulge. This is basic geometry meeting organic friction.
5. Setting the Border
To finish, we fold the upright stakes down into the weave to create a sturdy rim. This locks the entire structure together using the tension of the bent wood. Mastery Tip: Use a bone folder to burnish the edges of the rim. This compresses the surface fibers, creating a smooth, professional finish that resists fraying over time.
THE TECHNICAL LEDGER
Maintenance & Longevity: To keep your basket in peak condition, avoid placing it in direct sunlight, which can cause the natural oils to evaporate and lead to brittleness. A light application of linseed oil every two years will replenish the wood and enhance its natural patina.
Material Variations: For a sustainable twist, try using invasive species like Himalayan Balsam or even recycled copper wire for the weavers. Premium options include steamed "buff" willow, which has had the bark removed to reveal a creamy, smooth interior that takes dyes beautifully.
The Correction:
- The Kink: If a rod snaps, do not panic. Cut it at an angle and "splice" in a new, well-soaked rod by overlapping the ends by at least three inches.
- The Wobble: If the base is uneven, your tension was likely tighter on one side. Re-soak the base and use a heavy weight to press it flat as it re-dries.
- The Gap: If you see daylight between your rows, use a packing tool or a flat-head screwdriver to gently tap the weavers down into a tighter stack.
Studio Organization: Store your willow rods horizontally in a cool, dry place. Storing them vertically can cause the tips to bow under their own weight. Keep your tools in a dedicated roll to prevent the blades of your pruners from dulling against other metal objects.
THE FINAL REVEAL
Look at that! You have successfully navigated the complex physics of rhythmic basketry weaving. Your finished piece should feel solid, balanced, and surprisingly lightweight. The way the light catches the natural variations in the willow bark creates a visual texture that no machine-made product can replicate. You have taken raw, unruly stems and disciplined them into a functional form through the power of repetitive tension. This basket is not just a container; it is a record of your focus and the natural resilience of the materials you chose. It is time to display it proudly on your shelf or use it to hold your next batch of crafting supplies!
STUDIO QUESTIONS
How long should I soak my willow stems?
Soak dried willow for about one day per foot of length. Ensure the water is room temperature to allow the moisture to penetrate the dense outer bark and reach the inner cellulose fibers effectively.
What happens if my willow snaps while weaving?
Snapping usually indicates the wood is too dry or has a hidden knot. Simply trim the broken end at a 45-degree angle and slide a fresh, hydrated weaver into the existing gap to continue the pattern.
Can I use willow from my backyard?
Yes, provided it is a flexible variety. Test it by wrapping a stem around your wrist; if it bends without snapping, it has the necessary tensile strength for rhythmic basketry weaving and structural projects.
Do I need to peel the bark off?
Peeling is optional. Leaving the bark on provides a rustic look and extra protection for the fibers. Removing it, known as "buff" willow, creates a refined, smooth finish that is easier to dye or stain.
How do I stop the basket from molding?
Ensure the basket dries completely in a well-ventilated area after weaving. Avoid trapping moisture in the center. Once dry, the natural tannins in the willow act as a mild preservative against fungal growth.

