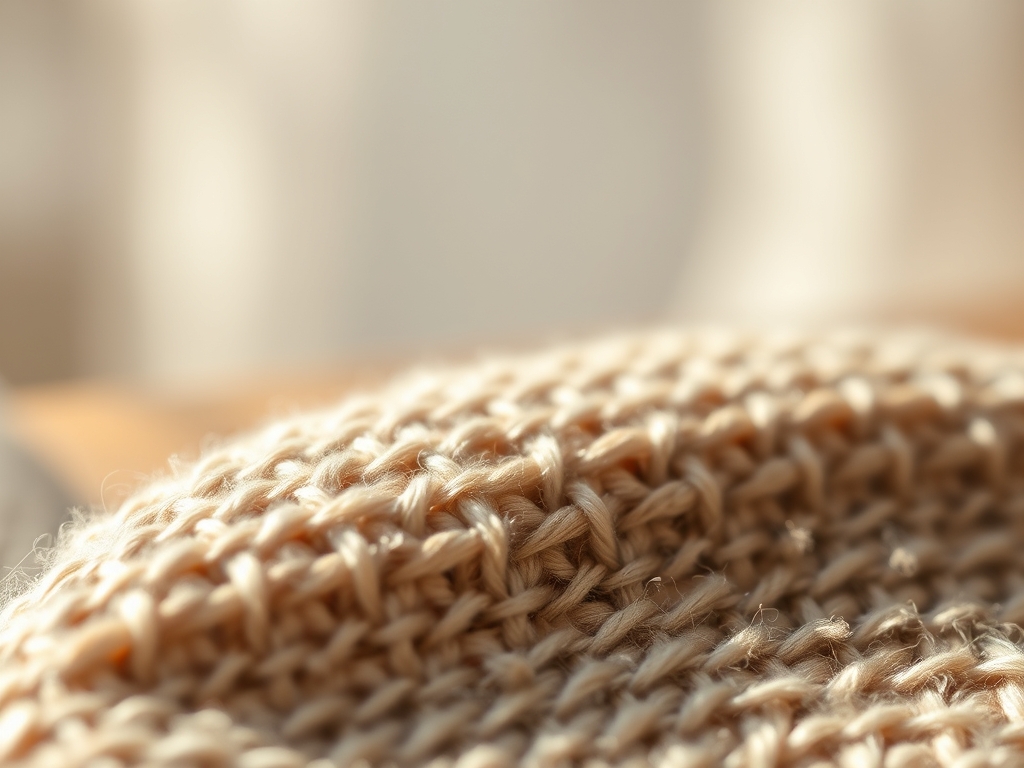
Close your eyes and run your fingertips across a raw slab of black walnut. You can feel the microscopic ridges where the saw blade bit into the cellulose fibers. It is rough, thirsty, and waiting for a transformation. This is where we begin our journey into Meditative Wood Polishing, a process that is less about manual labor and more about a rhythmic, chemical conversation between your hands and the timber. We are not just slapping on a topcoat; we are saturating the cellular structure to highlight the natural chatoyancy of the grain.
When you engage in this practice, you are working with the wood's porosity. Every stroke of the cloth is a lesson in fluid dynamics as the oil travels through the xylem vessels via capillary action. It is incredibly soothing to watch the pale, dusty surface deepen into a rich, amber hue. You will find that the repetitive motion regulates your breathing, turning a shop chore into a high-stakes session of mindfulness. We are aiming for a finish that feels like silk but possesses the structural integrity to last for generations. Let us get your studio ready for some serious friction.
THE STUDIO KIT
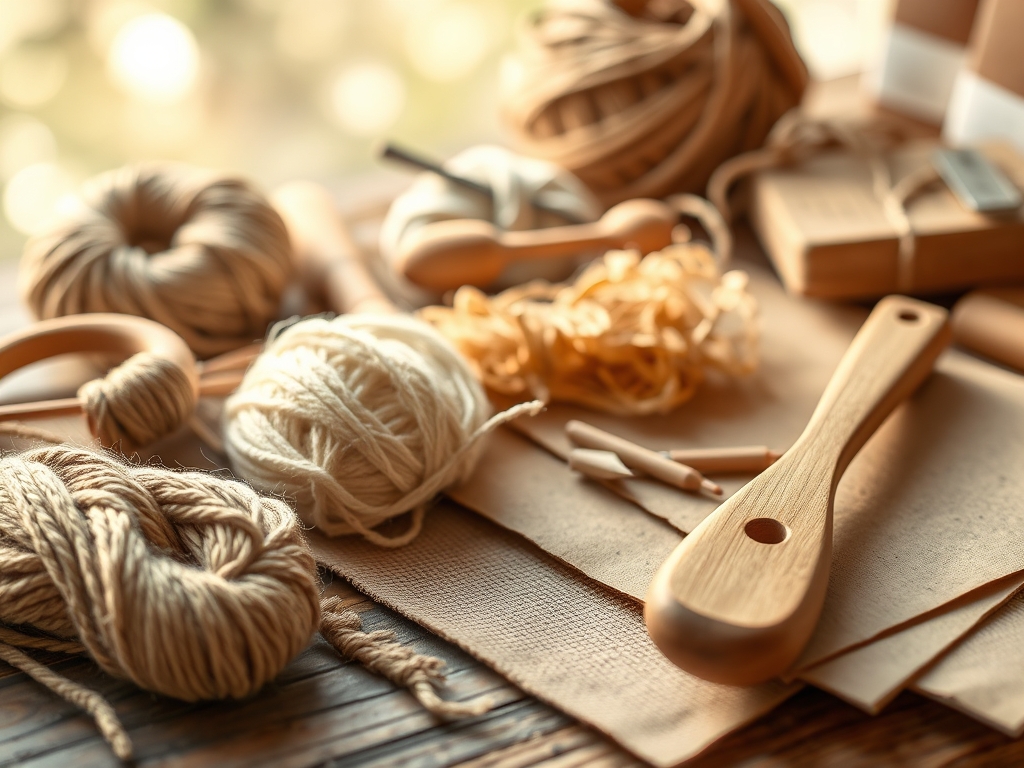
To master the art of the hand-rubbed finish, you need a kit that respects the tensile strength of the wood while allowing for delicate tactile feedback. Forget the heavy machinery for a moment. We are focusing on tools that allow you to feel the heat of the friction as you burnish the surface.
- The Oils: You will need a selection of pure, cold-pressed oils. We are looking for Raw Linseed, Tung, Walnut, Hemp, and Danish oil blends. Each has a different viscosity and drying time.
- Abrasives: A progression of silicon carbide sandpaper from 220 to 600 grit. For a truly meditative experience, keep a burnishing bone or a smooth river stone nearby to compress the fibers.
- Applicators: High-density lint-free cotton rags or professional-grade tack cloths. Avoid synthetic sponges that can snag on the grain direction.
- Measuring Tools: Use a digital caliper to check for surface uniformity if you are working on a turned piece like a bowl or a spindle.
- Safety Gear: Nitrile gloves to prevent skin oils from contaminating the wood and a respirator for any fine dust particles.
Material Substitutions: If you cannot find pure Tung oil, you can substitute it with a high-quality polymerized linseed oil. If you lack professional tack cloths, a piece of old, washed denim works surprisingly well for the final burnishing phase because of its tight weave and durability.
THE TEMPO
The "Maker's Rhythm" is governed by the drying rate of your chosen medium. Wood finishing is not a sprint; it is a slow-motion dance with evaporation and oxidation.
- The Prep (30-60 Minutes): Sanding through the grits. This is the most physically demanding part where you clear away the "noise" of the machining marks.
- The First Saturation (20 Minutes): Applying the heavy coat. You will watch the wood "drink" the oil.
- The Rest Period (24-48 Hours): This is the polymerization phase. The oil reacts with oxygen to create a hard, protective film inside the wood fibers.
- The Refinement (15 Minutes per coat): Light buffing and re-application. A standard meditative finish requires 3 to 5 coats for maximum depth.
The total duration of a project usually spans a week. You spend ten percent of that time working and ninety percent of that time waiting. This forced patience is the core of the meditative experience.
THE CORE METHOD
1. Preparing the Canvas
Before a single drop of oil touches the surface, you must ensure the grain is open and clean. Sand in the direction of the fibers to avoid "cross-grain" scratches that become glaringly obvious under oil. Use a tachometer or simply your palm to feel for heat; if the wood gets too hot, you are pressing too hard and risking frictional glazing.
Mastery Tip: Use a damp cloth to "raise the grain" before your final sanding. This causes the loose cellulose ends to stand up so you can shear them off with your 400-grit paper, ensuring the smoothest possible tactile result.
2. The First Saturation with Linseed Oil
Linseed oil is the classic choice for deep penetration. Pour a small amount onto your cloth and work in circular motions. This creates a slurry of oil and fine wood dust that acts as a natural grain filler. The molecular weight of linseed oil allows it to dive deep into the pores, stabilizing the wood from the inside out.
Mastery Tip: Watch for "dry spots." If the wood absorbs the oil in under five minutes, it means the capillary action is still pulling liquid into the lower layers. Keep the surface wet until it stays glossy for at least ten minutes.
3. Layering for Protection with Tung Oil
Tung oil provides a more water-resistant finish than linseed. It is thicker and requires more "elbow grease" to spread. This is the stage where you focus on the ergonomic flow of your arm, using your whole body to apply even pressure.
Mastery Tip: Tung oil undergoes a chemical change called polymerization. To speed this up without heat, ensure your studio has a constant flow of fresh air. Oxygen is the catalyst that turns the liquid oil into a solid, durable resin.
4. The Walnut Oil Buff
Walnut oil is a "drying oil" that is completely food-safe and has a wonderful, nutty aroma. It is perfect for kitchenware or items that will be handled frequently. At this stage, use less oil and more friction. You are no longer trying to saturate the wood; you are trying to burnish the top layer.
Mastery Tip: The heat generated by your hand helps the oil penetrate the microscopic valleys of the wood. This increases the surface tension of the finish, making it more resistant to spills and stains.
5. Final Burnish with Beeswax and Hemp Oil
For the ultimate meditative finish, blend a small amount of hemp oil with cosmetic-grade beeswax. Apply this paste in very thin layers. Use a bone folder or a soft cloth to buff the surface until it glows.
Mastery Tip: This final layer creates a "sacrificial" barrier. It protects the underlying oil finish from UV degradation and minor abrasions while providing a soft, matte luster that invites the touch.
THE TECHNICAL LEDGER
Maintenance & Longevity: To keep the finish alive, re-apply a light coat of walnut or hemp oil once every six months. If the wood looks "thirsty" or grey, the hydrophobic barrier has broken down.
Material Variations:
- Sustainable: Use reclaimed barn wood, but be aware that its high porosity will require twice as much oil.
- Premium: Exotic hardwoods like Cocobolo are naturally oily and may resist drying oils; wipe them with acetone first to clear the surface resins.
The Correction:
- The Mistake: Tacky surface that won't dry. The Fix: Wipe the piece down with mineral spirits to remove the excess unpolymerized oil and start the drying clock over.
- The Mistake: Dust nibs in the finish. The Fix: Use a piece of brown paper bag to lightly "sand" the surface. The paper is abrasive enough to remove dust but too soft to scratch the oil.
- The Mistake: Blotchy absorption. The Fix: This happens in softwoods like pine. Use a "pre-stain" conditioner or a very thin coat of shellac to even out the density before oiling.
Studio Organization: Store your oil-soaked rags in a water-filled metal container. The oxidation of drying oils is an exothermic reaction and can cause spontaneous combustion. Never leave them bunched up on a workbench.
THE FINAL REVEAL
Look at that glow! Your piece now possesses a depth that no spray-on lacquer could ever replicate. By following the principles of Meditative Wood Polishing, you have transformed a simple piece of lumber into a sensory masterpiece. The grain pops with three-dimensional clarity, and the surface feels warm and organic. This is the reward for your patience and your technical precision. You didn't just finish a project; you mastered the physics of the grain.
STUDIO QUESTIONS
What is the best oil for a food-safe finish?
Pure Walnut oil or raw Linseed oil are the top choices. They are non-toxic and cure naturally over time. Avoid "Boiled" Linseed oil for food surfaces, as it often contains metallic drying agents like cobalt or manganese.
How do I prevent my wood from turning yellow?
All oils will amber the wood slightly due to their natural pigments. To minimize this, use a clear water-based finish or a highly refined "white" poppy seed oil, which has a lower refractive index and stays clearer than linseed.
Can I apply oil over a stained surface?
Yes, provided the stain is completely dry and does not contain wax. The oil will penetrate through the pigment particles to reach the wood fibers, but it may lift some color, so always test a small gauge area first.
How long does a hand-rubbed oil finish actually last?
With proper maintenance, an oil finish can last a lifetime. Unlike film finishes that crack or peel, oil becomes part of the wood structure. Simply re-oil the surface whenever it begins to look dull or loses its tactile smoothness.