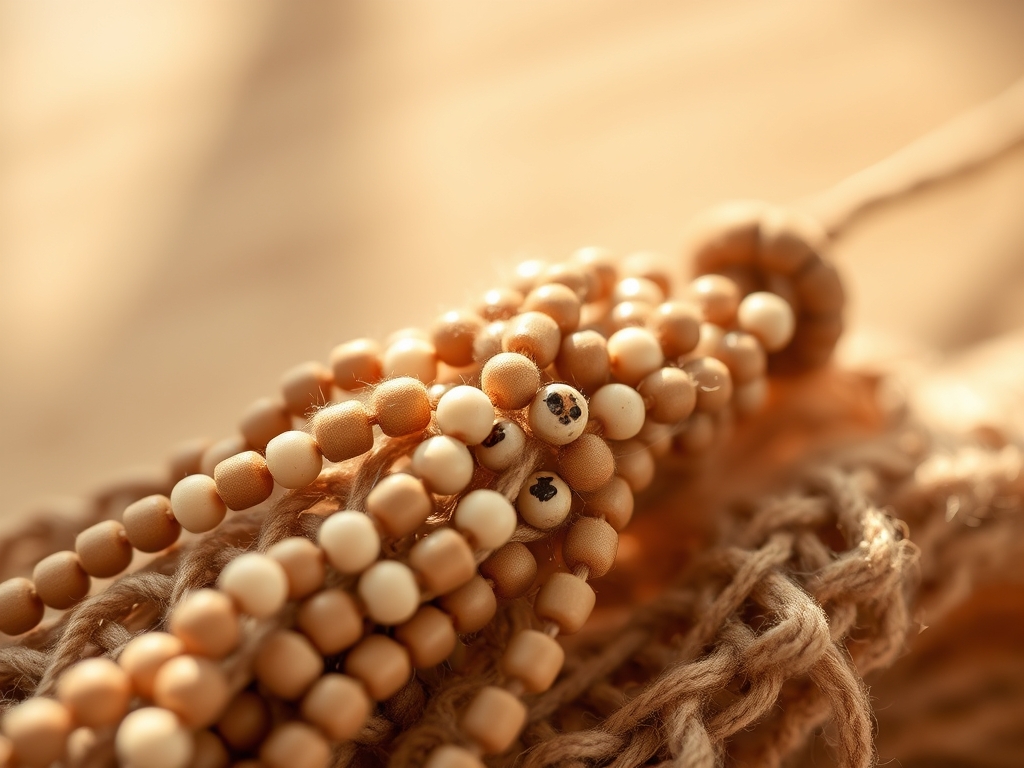
Imagine the weight of high density glass rolling across your palm; it is cool, smooth, and possesses a specific gravity that promises a satisfying drape. When you dive into the world of repetitive bead stringing, you are not just making jewelry; you are engaging in a rhythmic engineering project that balances tension and gravity. The click of a ceramic bead hitting a steel tray provides a crisp acoustic feedback that signals the start of your creative flow. We are looking for that perfect tactile response where the thread disappears into the bore of the bead, creating a seamless line of color. This process requires a deep understanding of how individual units aggregate into a flexible solid. As you slide each bead down the silk, you feel the subtle friction of the fibers gripping the internal walls of the hole. It is a meditative dance between your fingertips and the raw materials. By mastering the sequence, you transform a pile of loose components into a structured masterpiece that follows the natural contours of the body with fluid precision.
THE STUDIO KIT
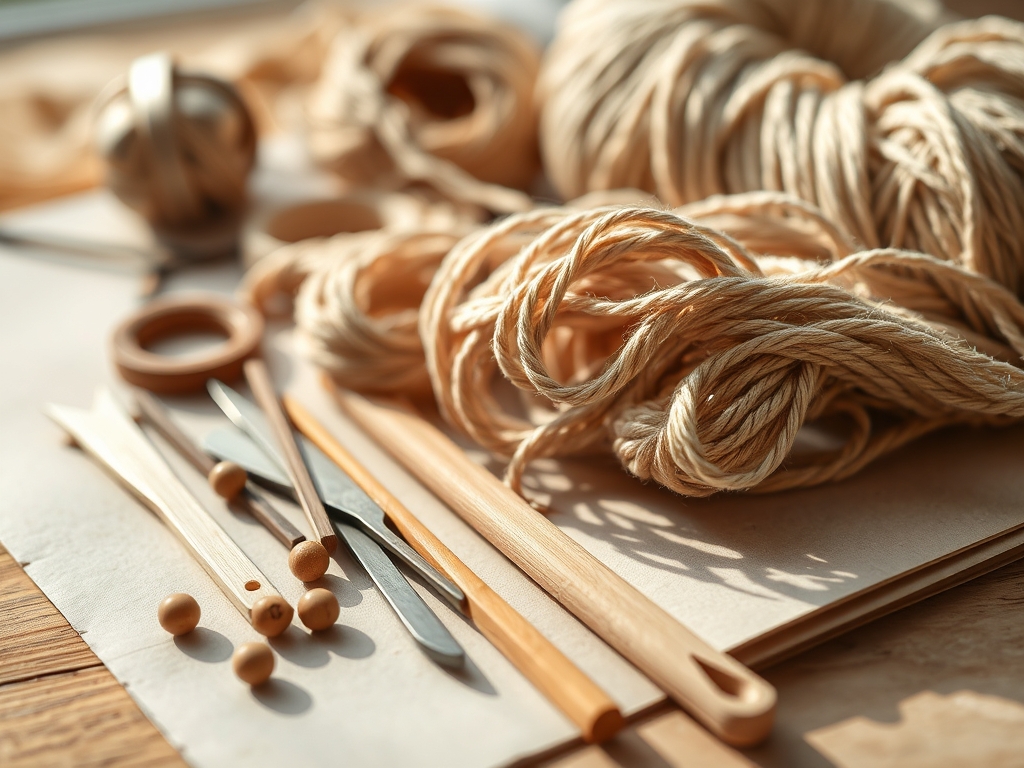
To achieve professional results, your workstation must be an organized ecosystem of high precision instruments. Your primary tool is the jeweler's awl, which is essential for guiding knots and clearing debris from bead channels. You will also need a pair of digital calipers to measure the outer diameter of your beads, ensuring your pattern remains mathematically consistent. For the foundation, select a high tensile strength nylon or silk thread; nylon offers superior resistance to abrasion while silk provides a classic, organic drape.
The choice of beads dictates the structural integrity of the piece. Porous semi-precious stones like turquoise require a different handling technique than non-porous fire-polished glass. You should also have a bead mat made of synthetic fleece to prevent rolling and a precision thread burner to cauterize ends without fraying.
Material Substitutions: If silk is unavailable, a multi-strand stainless steel wire coated in nylon provides extreme durability for heavier stone patterns. Instead of traditional crimp beads, you can use bullion (French wire) to protect the thread where it meets the clasp, significantly increasing the lifespan of the connection point by reducing mechanical friction.
THE TEMPO
The maker's rhythm is a calculated pace that prevents physical fatigue and ensures technical accuracy. Repetitive bead stringing is divided into three distinct phases. The Preparation Phase takes approximately thirty minutes; this involves sorting beads by size and checking for occlusions in the bore holes. The Execution Phase is the heart of the project, typically requiring two to four hours depending on the complexity of the color transitions. During this time, you enter a flow state where your hands move with a consistent velocity. Finally, the Finishing Phase takes twenty minutes to secure the fasteners and perform a stress test on the knots. Total project time averages three to five hours. Respecting this tempo prevents the "rushed hand" syndrome, where tension becomes uneven and the necklace begins to pucker or twist.
THE CORE METHOD
1. Calibrating the Foundation
Before the first bead is placed, you must pre-stretch your thread. Silk has a natural elasticity that will cause a necklace to sag over time if not properly conditioned. Secure one end of the thread and apply a steady, moderate pull. This aligns the internal fibers and removes the "memory" of the spool.
Mastery Tip: This process relies on tensile orientation. By pre-stretching, you ensure the thread reaches its maximum stable length before the weight of the beads is added, preventing structural gaps from forming later.
2. Establishing the Anchor
Attach your clasp using a reinforced loop. Use your jeweler's awl to guide the thread through a protective piece of bullion. This metal coil acts as a buffer against the hard edge of the clasp, distributing the load across a larger surface area.
Mastery Tip: This utilizes the principle of load distribution. The bullion prevents the metal clasp from acting as a saw against the soft thread fibers, which would otherwise lead to a catastrophic failure at the connection point.
3. Executing the Gradient Shift
For a repetitive color pattern, use a 3-2-1 sequence to transition between hues. String three beads of color A, then two of color A and one of color B, then one of A and two of B. This creates a visual "blur" that is more sophisticated than a hard stop between colors.
Mastery Tip: This technique exploits optical blending. By interleaving the colors, the human eye perceives a smooth transition rather than a jarring break, making the repetitive pattern feel organic and high end.
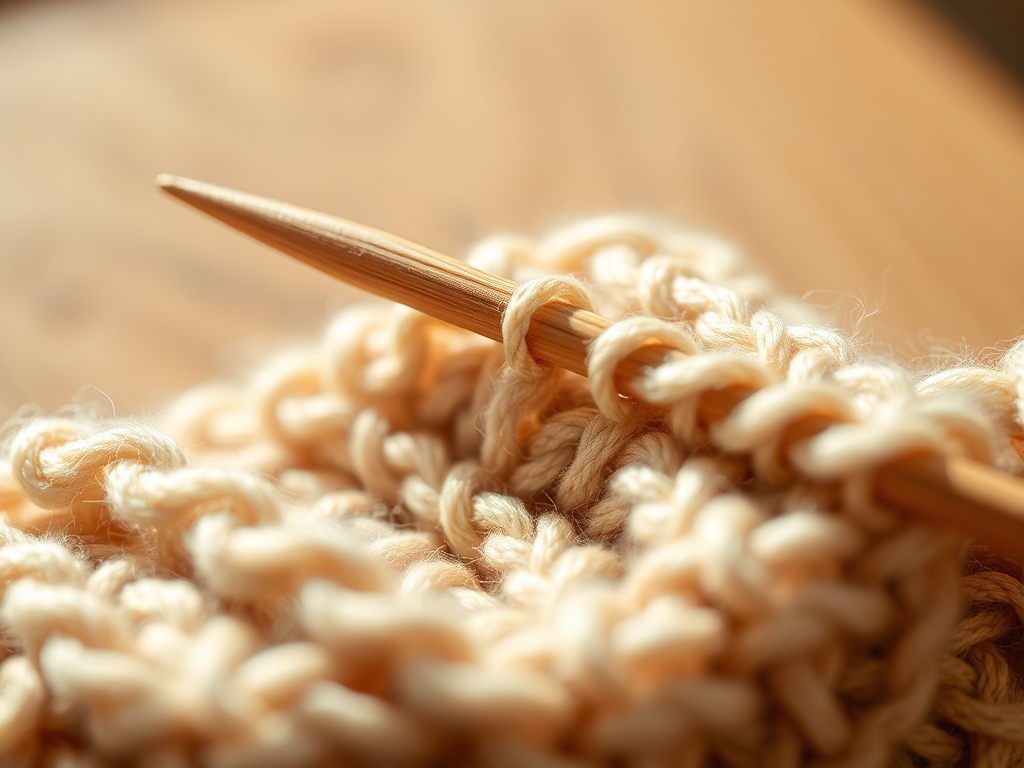
4. Managing Internal Friction
As you string, ensure each bead sits flush against the next. If you are knotting between beads, use the awl to push the knot directly against the bead face. The knot should be tight enough to prevent movement but loose enough to allow the necklace to coil.
Mastery Tip: This balances kinetic energy. If beads have too much room to move, they act like tiny hammers against the thread. Tight, consistent spacing converts that movement into a controlled curve.
5. Tension Verification
Every ten inches, hold the necklace up by one end. Observe how it hangs. If it kinks or spirals, your tension is too high. If there are visible gaps of thread, your tension is too low. Adjust immediately by sliding the beads and resetting the most recent knots.
Mastery Tip: This is a check of torsional balance. A perfectly strung repetitive necklace should have zero internal torque, meaning it will not try to twist or flip when worn against the skin.
6. The Final Termination
Ending the necklace requires a "hidden" knot technique. Pass the thread back through the last three beads after securing the clasp. Apply a tiny drop of precision adhesive to the final knot before pulling it inside the bore of a bead.
Mastery Tip: This uses capillary action. The adhesive wicks into the fibers of the knot, fusing them into a solid mass that is protected from external wear by the surrounding bead wall.
7. Burnishing and Cleaning
Once complete, use a soft microfiber cloth to wipe down the beads. This removes skin oils and dust accumulated during the assembly process. For glass or metal beads, a light buffing restores the factory luster.
Mastery Tip: This final step addresses surface contamination. Removing oils prevents long term chemical degradation of the thread, especially if using organic materials like silk which can absorb fatty acids.
THE TECHNICAL LEDGER
Maintenance & Longevity: To keep your repetitive bead stringing project in peak condition, avoid contact with perfumes or hairsprays. These chemicals can weaken the molecular bonds of nylon and discolor natural stones. Re-string your necklace every two years if worn frequently to account for microscopic fiber wear.
Material Variations:
- Sustainable: Use tagua nuts or recycled sea glass paired with organic hemp cord.
- Premium: Opt for AAA grade Japanese Akoya pearls and 14k gold findings.
- Industrial: Use matte black lava rock and oxidized silver for a brutalist aesthetic.
The Correction:
- The Gap: If a gap appears, do not restart. Use a "spacer bead" technique by inserting a tiny seed bead at the clasp end to take up the slack.
- The Kink: If the necklace curls, steam it gently. The heat and moisture allow the fibers to relax and reset into a straight orientation.
- The Fray: If the thread frays near a bead, the bore is likely jagged. Use a diamond bead reamer to smooth the internal channel before re-stringing.
Studio Organization: Store your finished necklaces flat or on a padded bust. Hanging them for long periods can cause "gravity creep," where the weight of the beads permanently stretches the thread. Keep your thread spools in a dark, temperature controlled bin to prevent UV degradation of the polymers.
THE FINAL REVEAL
Look at that magnificent drape! The way the light catches the repetitive pattern creates a rhythmic shimmer that is absolutely hypnotic. You have successfully navigated the physics of tension and the chemistry of materials to create something that feels as good as it looks. The weight is balanced; the knots are invisible; and the color transitions are buttery smooth. This isn't just a necklace; it is a testament to your precision and your eye for detail. Wear it with pride, knowing that every single bead was placed with a master's touch and a scientist's mind. You have officially leveled up your studio game!
STUDIO QUESTIONS
How do I choose the right thread gauge?
Select a thread diameter that fills approximately 60 to 70 percent of the bead's hole. This provides enough structural support to prevent sagging while allowing the thread to remain flexible enough for intricate knotting and fluid movement.
Why does my necklace keep twisting?
Twisting usually results from inconsistent tension or "loading" the thread with too much torque during the stringing process. Ensure you are not spinning the beads as you slide them down, and keep the thread relaxed between each placement.
Can I use glue on every knot?
No; gluing every knot makes the necklace too rigid and brittle. Only apply adhesive to the terminal knots at the clasp. The internal knots should rely on mechanical friction and proper tying techniques to maintain the piece's natural flexibility.
What is the best way to clean glass beads?
Use a damp, lint free microfiber cloth with a tiny amount of pH neutral soap. Avoid ultrasonic cleaners for stranded necklaces, as the vibrations can cause the thread to rub against the bead bores, leading to premature fraying.