Imagine the smell of wet earth and the hum of a motor spinning at sixty revolutions per minute. There is a specific, electric thrill when your palms first meet a cold lump of clay. To master wheel throwing basics, you have to stop fighting the material and start dancing with its unique physics. It is a game of friction and fluid dynamics.
The clay is not just mud; it is a suspension of alumina and silica particles held together by water. When you press into it, you are literally rearranging those microscopic plates to create a structure that can defy gravity. It feels gritty yet silky. It is a tactile conversation between your skeletal structure and the centrifugal force of the wheel. If you do not commit your entire body weight to the center of that spinning mass, the clay will win every time. We are going to dive into the mechanics of how to make that clay behave like liquid glass under your fingertips. It is messy, it is technical, and it is absolutely addictive once you understand the science of the spin.
THE STUDIO KIT
THE STUDIO KIT
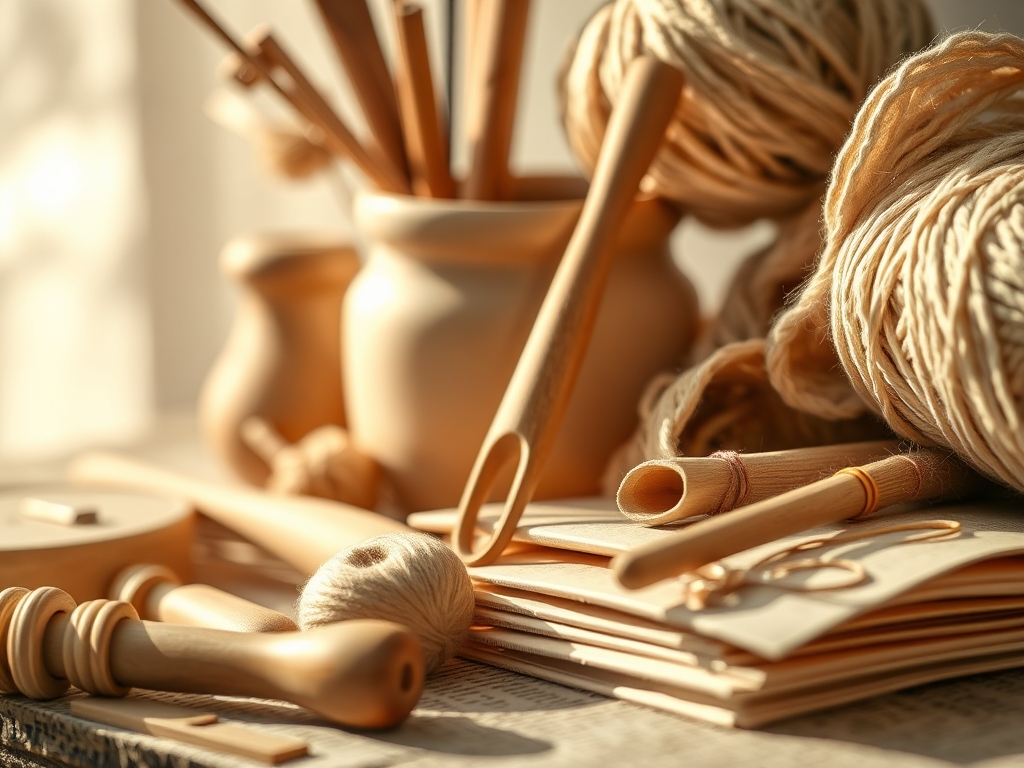
To execute these wheel throwing basics with precision, you need a kit that respects the porous nature of your medium. Your primary tool is the electric wheel, but the secondary tools determine the final tensile strength of your vessel. You need a high-quality synthetic sponge to manage moisture levels without oversaturating the clay body. A wooden rib acts as an extension of your hand to compress the exterior walls, while a wire clay cutter with a high-gauge stainless steel strand is essential for releasing the piece from the bat.
For fine detail work, keep a needle tool or a small awl nearby to check floor thickness. If you are working on a budget, you can find excellent material substitutions in your kitchen. A silicone spatula works beautifully as a flexible rib, and a piece of high-test fishing line can replace a professional wire cutter. The goal is to maintain a balance of tools that allow for ergonomic movements while managing the capillary action of water moving through the clay. Always have a bucket of "slop" or slip ready; this acts as your primary lubricant, reducing the friction that leads to torque-induced collapses.
THE TEMPO
The "Maker's Rhythm" is a chronological dance that cannot be rushed. You start with the Preparation Phase, which takes about ten minutes of vigorous wedging to align the clay particles and remove air pockets. The Active Throwing Phase should ideally last between fifteen to twenty-five minutes. If you spend too much time on the wheel, the clay becomes "tired" as it absorbs too much water, losing its structural integrity and collapsing into a puddle.
After the throwing is done, the Drying Phase begins. This is where patience becomes a technical requirement. You must allow the piece to reach a leather-hard state over twelve to twenty-four hours, depending on the humidity of your studio. This stage is crucial because the water is evaporating, causing the clay to shrink. If the shrinkage happens too fast, the piece will crack. Finally, the Trimming Phase takes another twenty minutes to refine the foot and remove excess weight. Understanding this tempo ensures you are working with the physics of the material rather than against the clock.
THE CORE METHOD
1. Wedging and Centering
Before the clay even touches the wheel, you must wedge it using a "rams head" or spiral technique. This ensures a homogenous density throughout the mass. Once on the wheel, use your body weight to push the clay into the exact center.
Mastery Tip: The science here is all about centripetal force. By bracing your elbows against your hips, you use your skeletal system as a fixed point. This allows you to overcome the clay's momentum without using pure muscle power, which is prone to shaking.
2. Opening the Well
With the clay centered, press your thumbs into the middle to create a hole. You must leave about half an inch of clay at the bottom to serve as the floor. Use your calipers to check the depth if you are unsure.
Mastery Tip: This step relies on hydrodynamic lubrication. You must keep a thin film of water between your skin and the clay to prevent the friction from grabbing your thumb and pulling the entire piece off-center.
3. Compressing the Floor
Use your fingers or a wooden tool to press firmly across the bottom of the well. Move from the center outward to the interior wall.
Mastery Tip: Compression is vital for preventing S-cracks. By pressing down, you are forcing the flat clay particles to interlock tightly, which increases the tensile strength of the base as it dries and shrinks.
4. The First Pull
Place one hand inside and one hand outside at the base of the clay. Squeeze gently and lift upward in a slow, controlled motion. This creates the initial wall height.
Mastery Tip: You are managing plasticity here. The clay needs to be soft enough to move but firm enough to hold its shape. The speed of your hands must match the speed of the wheel to ensure even wall thickness.
5. Refining the Cylinder
As the walls get thinner, use a metal or wooden rib on the exterior to scrape away excess slip and compress the particles. This strengthens the vertical structure.
Mastery Tip: This process involves burnishing the surface at a micro-level. By removing the excess water and slurry from the outside, you stop the clay from becoming overly saturated and "slumping" under its own weight.
6. Shaping and Collaring
If you want a bowl or a vase, gently push from the inside out or use both hands to "collar" the neck inward. Do this in small increments to avoid stressing the clay.
Mastery Tip: The clay has a memory. If you push it too far too fast, the internal stresses will cause it to warp during the firing process. Small, incremental changes allow the particles to adjust to their new positions.
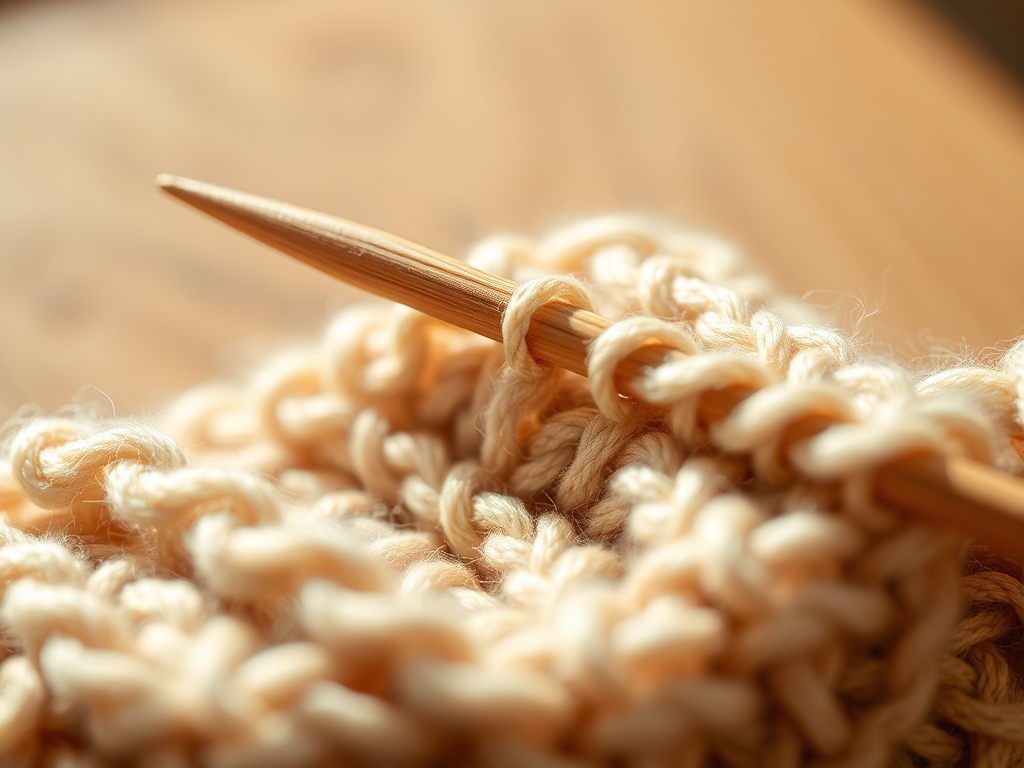
7. The Final Cut
Use your wire cutter to slice the piece off the bat. Ensure the wire stays taut and flat against the wheel surface to create a clean, level bottom.
Mastery Tip: This step is about breaking the surface tension between the wet clay and the plastic or wooden bat. A quick, decisive motion prevents the wire from wandering and creating an uneven floor.
THE TECHNICAL LEDGER
To keep your studio running efficiently, Maintenance & Longevity are paramount. Your wheel should be wiped down after every session to prevent dried clay dust from entering the motor or your lungs. Material Variations play a huge role in your success; a "stoneware" body with added grog (fired clay bits) offers more structural support for beginners, while a "porcelain" body is smooth but has very low green-strength and requires expert handling.
The Correction:
- The Wobble: If the clay goes off-center, stop the wheel and re-lubricate. Do not try to fix it at high speed; slow down and use a "karate chop" hand position to force it back.
- Thin Rims: If the top of your pot gets too thin, it will vibrate and collapse. Use a chamois cloth to compress the rim downward after every pull to keep it thick and stable.
- Air Bubbles: If you hit a pocket of air, use your needle tool to poke it at an angle, then compress the clay over the hole to seal it.
Studio Organization: Store your wet projects in a "damp box" or under heavy plastic sheeting. This creates a micro-climate that slows evaporation, ensuring the rim and the base dry at the same rate to prevent warping.
THE FINAL REVEAL
There is nothing quite like the moment you lift a finished piece off the wheel. It is a transformation from a raw, geologic lump into a functional object of symmetry. The surface should be smooth, the walls even, and the form balanced. When you hold that leather-hard pot, you are holding a physical record of your focus and technical skill. It is a high-energy win that proves you have mastered the basics of physics and art.
STUDIO QUESTIONS
What is the best clay for wheel throwing basics?
Stoneware with a fine grog is ideal. The grog provides a structural skeleton that helps the walls stand up during pulls, making it much more forgiving for beginners than smooth porcelain or heavy earthenware.
How do I stop my pots from cracking at the bottom?
Ensure you compress the floor thoroughly during the opening stage. Use a rib to press the clay particles together. This prevents the "S-crack" that occurs when the center shrinks faster than the edges.
Why does my clay always collapse?
Collapses are usually caused by over-saturation. Using too much water breaks down the clay's "green strength." Use slip instead of water for lubrication and try to finish your piece in under twenty minutes.
How do I know when to stop pulling the walls?
Stop when the walls are a consistent thickness from bottom to top, usually about a quarter-inch for beginners. If the rim starts to wobble or feel soft, the clay has reached its structural limit.