
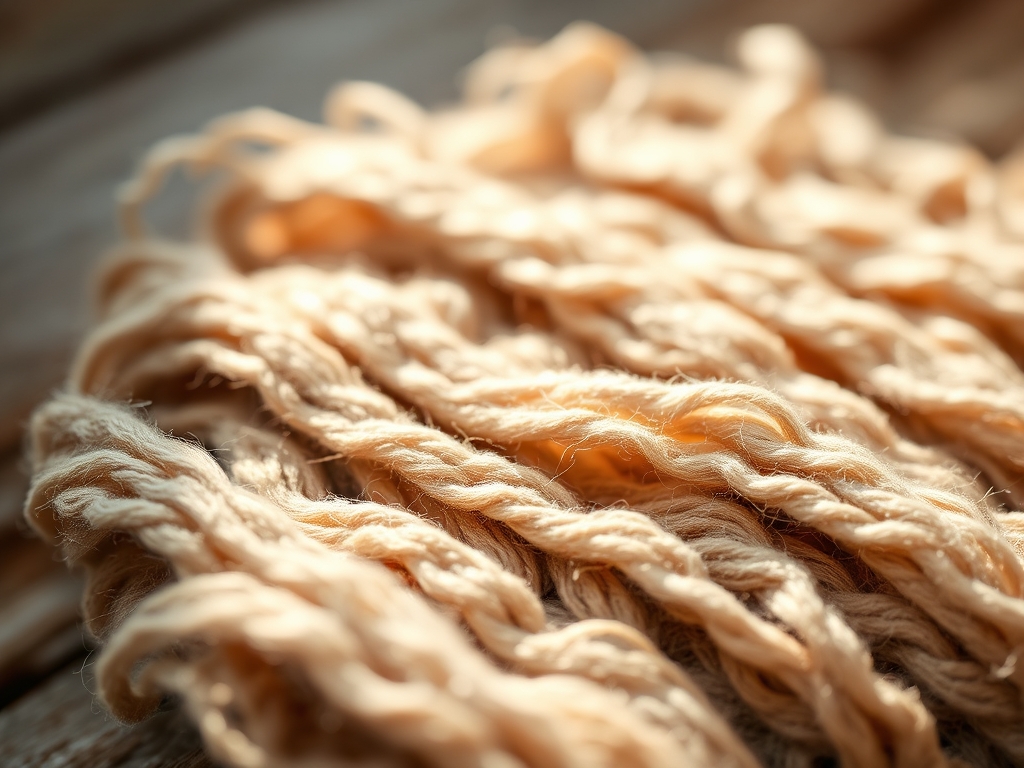
Imagine plunging your hands into a cloud of unspun wool that feels like a literal dream. We are not just making art today; we are engineering a tactile masterpiece using Rhythmic Weaving Textures to transform a flat loom into a three-dimensional landscape. When you pull a thick, airy roving through the warp, you are managing the structural integrity of unspun fibers that want to drift apart. The magic happens when you balance the density of the wool with the tension of your loom. We are going for that high-impact, chunky aesthetic that makes people want to reach out and touch the wall. It is all about the "loft," which is the technical term for the volume and air trapped within the fiber. If you pack it too tight, you lose the bounce; if you leave it too loose, the piece sags over time due to gravity pulling on the fiber weight. We are going to master the physics of friction and fiber migration to ensure your wall hanging looks as plush in ten years as it does the moment you cut it off the frame.
THE STUDIO KIT
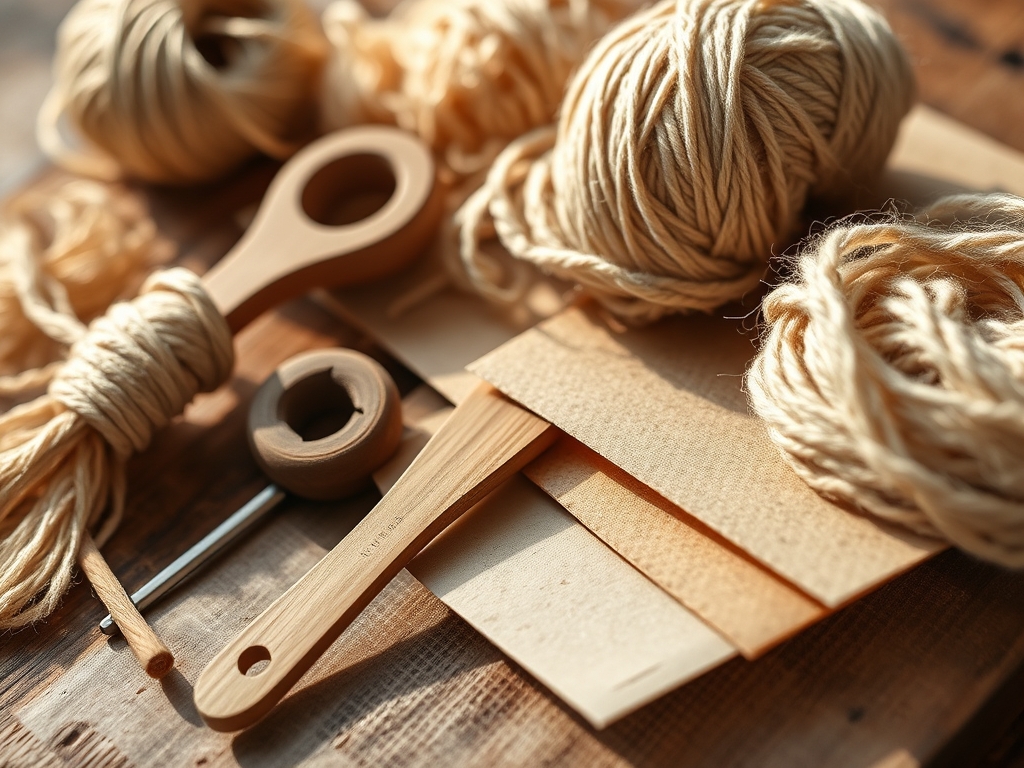
To achieve professional results, your workspace needs to resemble a textile laboratory. You will need a sturdy frame loom with adjustable tension bolts to handle the heavy load of the roving. Your warp thread should be a high-tensile cotton or linen twine; avoid stretchy synthetics that will fail under the weight of the wool. Grab a wooden weaving comb or a wide-tooth hair pick to pack your rows without shredding the delicate roving fibers. You will also need a pair of industrial fabric shears for clean cuts and a large-bore tapestry needle for tucking in ends. For precise measurements of your fiber thickness, a pair of digital calipers can help you maintain consistency across different roving types.
Material Substitutions: If you cannot source premium Merino roving, you can use recycled sari silk ribbons for a high-shine alternative or cotton core spun yarn for a more structural, architectural look. If you lack a professional loom, a sturdy wooden picture frame with brass finishing nails spaced at quarter-inch intervals works as a functional substitute.
THE TEMPO
The "Maker's Rhythm" is a state of flow where your hands move in sync with the mechanical resistance of the loom. Expect to spend approximately thirty minutes on warp setup, ensuring your tension is uniform across the entire width. The core weaving phase for a medium-sized piece usually takes four to six hours, depending on the complexity of your texture shifts. Finally, allow one hour for finishing and mounting, which includes the delicate task of securing the back and brushing out the fringe. This is not a race; it is a mechanical process where the speed of your hand must match the "memory" of the wool fibers as they settle into place.
THE CORE METHOD
1. Setting the Foundation with Soumak
Start by anchoring your work with a row of Soumak stitching. This technique involves wrapping the roving around individual warp threads in a circular motion, creating a braided appearance. This provides the necessary lateral stability to prevent the heavier rovings from sliding down the warp.
Mastery Tip: Observe the tensile strength of your warp. If the Soumak stitch causes the warp threads to pull inward (the hourglass effect), your tension is too high. Maintain a neutral "shed" to ensure the piece stays rectangular.
2. Creating the Bubbled Roving Effect
To create those iconic "clouds," pull the roving through the warp and use your fingers to tug sections upward. This increases the surface area of the wool, allowing more light to catch the individual scales of the fiber. This is where we truly lean into Rhythmic Weaving Textures by alternating the height of each bubble.
Mastery Tip: Understand fiber migration. Because roving is unspun, the individual hairs are held together only by friction. If you pull too hard, you will experience "drafting," where the roving thins out and snaps. Use a light touch to preserve the loft.
3. Integrating the 8 Fluffy Rovings
Introduce your eight different roving types, ranging from fine 19-micron Merino to chunky Icelandic wool. Varying the micron count (the diameter of the fiber) creates visual depth. Use a weaving sword or a flat ruler to open the shed wide, allowing the bulky roving to pass through without snagging on the warp.
Mastery Tip: This is a lesson in capillary action and moisture. Wool is hygroscopic, meaning it absorbs moisture from the air. High-density rovings will hold more weight in humid environments, so ensure your knots are reinforced to handle potential weight fluctuations.
4. Tapering and Finishing
As you reach the top of your piece, transition back to a thinner yarn or a tighter weave. This acts as a "header" that locks the voluminous rovings in place. Use a bone folder to press the final rows down firmly, ensuring there are no gaps where the roving could shift.
Mastery Tip: Use mechanical interlocking. By weaving a few rows of plain weave (over-under) with a thin, strong thread between your roving sections, you create a "shelf" that supports the weight of the fluff above it, preventing long-term distortion.
THE TECHNICAL LEDGER
Maintenance & Longevity: Wool is a natural protein fiber. To prevent degradation, keep your weaving out of direct sunlight, which can cause photo-oxidation and make the fibers brittle. Use a pressurized air canister (like those for keyboards) to blow dust off the piece rather than vacuuming it, which can cause pilling.
Material Variations:
- Sustainable: Organic GOTS-certified wool or hemp roving.
- Recycled: "Cloud" fiber made from plastic bottles or reclaimed garment waste.
- Premium: Silk-blend rovings or Yak fiber for extreme softness and luster.
The Correction:
- The Hourglass: If the sides curve in, you are pulling the roving too tight. Fix: Use the "weaving an arc" method where you lay the roving in a high curve before beating it down.
- Shedding: If the roving looks messy, the fibers are too short. Fix: Lightly mist the roving with water and "felt" the surface slightly with your palms to lock the fibers.
- Loose Warp: If the piece feels floppy, your warp tension was too low. Fix: Carefully tighten the knots at the top of the loom using an awl to pull the slack through.
Studio Organization: Store your roving in airtight polypropylene bins to prevent moth infestations and moisture absorption. Label each bin with the fiber origin and micron count to keep your inventory organized for future projects.
THE FINAL REVEAL
Look at that texture! Your wall hanging is a masterclass in Rhythmic Weaving Textures, showing off a sophisticated interplay of shadows and highlights. The way the light hits the varied "loft" of those eight rovings creates a sense of movement that a flat weave simply cannot match. You have successfully navigated the physics of fiber friction and warp tension to create something that is both structurally sound and visually stunning. It is plush, it is bold, and it is a total vibe. Hang it with pride; you have officially leveled up your textile game.
STUDIO QUESTIONS
How do I stop my roving from pilling?
Avoid over-handling the fiber during the weaving process. If pilling occurs after hanging, use a pair of fine embroidery scissors to snip away the pills rather than pulling them, which prevents further fiber agitation.
What is the best warp for heavy roving?
A multi-ply cotton twine or a linen cord is best. These materials have low elasticity and high tensile strength, ensuring the loom tension remains constant under the significant weight of the unspun wool rovings.
Can I wash a roving wall hanging?
No, traditional washing will cause the roving to felt and shrink. To clean it, take the piece outside and gently shake it, or use a soft-bristled brush to whisk away surface dust without disturbing the fiber structure.
How do I join two pieces of roving?
Use the spit-splice method or dry felting. Overlap the two ends, add a bit of moisture and friction by rubbing them between your palms, or use a felting needle to mechanically interlock the fibers together seamlessly.
Why is my weaving curving at the edges?
This is caused by excessive horizontal tension. When you pull the roving through the shed, ensure you leave enough "slack" in an arch shape before using your weaving comb to pack the row down into place.

