
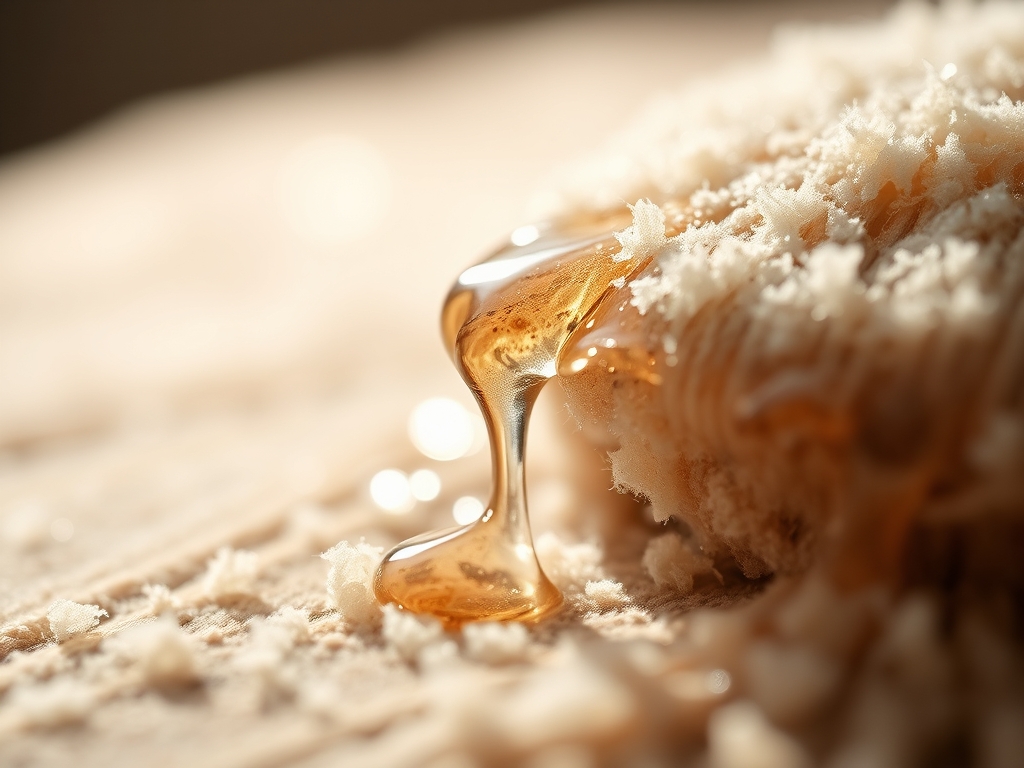
Listen to that sound. It is the rhythmic tap of a loaded brush hitting the edge of a porcelain palette; it is the heartbeat of your studio. When you master fluid watercolor drips, you are not just playing with paint. You are conducting a symphony of gravity and surface tension. The way the pigment suspended in distilled water races down the tooth of a cold-pressed sheet is pure physics. It feels electric to watch that first bead of color break its own meniscus and streak toward the floor. We are talking about high-speed liquid dynamics meeting high-stakes creative expression.
In this space, we do not just dabble. We manipulate the molecular bonds of the medium to create movement that feels alive. To get those perfect, elongated fluid watercolor drips, you have to understand the viscosity of your wash. If it is too thick, it stalls like a car on a hill; if it is too thin, the color loses its pigment load and looks ghostly. We are aiming for that sweet spot where the water acts as a high-speed vehicle for the mineral particles in your paint. Grab your apron and clear the bench. We are about to get messy in the most sophisticated way possible.
THE STUDIO KIT

To execute these techniques with professional precision, your inventory must be top-tier. Start with 300 GSM cold-pressed paper. The weight is vital because a lower grammage will buckle under the hydraulic pressure of a heavy wash, ruining your vertical flow. You will need a mop brush with high water retention capabilities; natural squirrel hair or high-end synthetic blends work best because they hold a massive reservoir of liquid.
For the technical side, keep a pipette or a medical-grade syringe nearby for controlled delivery. You will also need a spray mister to manipulate the surface tension of the paper before the drop hits. If you want to get really nerdy, keep a digital hygrometer in your room. Humidity levels change how fast your drips dry and how much they "bloom" at the edges.
Material Substitutions: If you lack high-grade watercolor paper, you can use heavyweight cardstock treated with a clear gesso, though the absorption rate will differ. No pipette? A plastic straw works as a rudimentary vacuum tool. Instead of professional artist-grade tubes, you can grind high-pigment watercolor pans into a concentrated liquid, but ensure you filter out any large sediment to maintain a smooth flow.
THE TEMPO
The "Maker's Rhythm" for watercolor drips is a game of two halves: high-intensity action followed by meditative patience.
Phase 1: Preparation (15 Minutes). This is where you calibrate your pigments. You are mixing "mother washes" in jars, ensuring the solute-to-solvent ratio is consistent across all colors.
Phase 2: The Execution (20 Minutes). This is the "live" phase. Once the paper is tilted and the first drop is released, you are working against the clock of evaporation. You have about twenty minutes of "open time" before the edges begin to set and lose their ability to blend.
Phase 3: The Cure (4 to 6 Hours). This is the hardest part. You must leave the piece in a flat, draft-free environment. If you move it too soon, the capillary action within the fibers will shift, and your crisp lines will blur into a muddy mess.
THE CORE METHOD
1. Gravity-Fed Linear Streaks
Secure your paper to a rigid board using archival artist tape. Tilt the board at a 45-degree angle. Load your mop brush until it is dripping, then touch the top edge of the paper. As the bead rolls down, the gravitational pull overcomes the friction of the paper fibers.
Mastery Tip: Watch the "bead" at the bottom of the drip. If it stops moving, use a pipette to add a single drop of clear water to the top of the trail. This reduces the internal friction and restarts the flow without diluting the color too much.
2. Controlled Splatter Bursts
Hold a rigger brush six inches above the surface. Using a wooden dowel or a bone folder, tap the ferrule of the brush sharply. This uses kinetic energy to launch the paint.
Mastery Tip: The height from which you drop the paint determines the "splash crown." Higher drops create more radial velocity, resulting in longer, thinner "fingers" of paint radiating from the center of the impact.
3. Wet-on-Wet Diffusion Drips
Mist your paper with a fine spray until the surface has a satin sheen. Apply a heavy drop of concentrated pigment. The water already on the paper acts as a lubricant, allowing the drip to spread laterally as it moves downward.
Mastery Tip: This technique relies on hydrostatic pressure. If the paper is too wet (puddling), the drip will lose its shape. Use a lint-free sponge to dab away excess water from the edges of the board to maintain structural integrity.
4. Resisted Flow Channels
Use a ruling pen to apply masking fluid in thin, vertical lines. Once dry, run your fluid watercolor drips over these areas. The hydrophobic nature of the mask will force the water to navigate around the barriers.
Mastery Tip: This creates "braided" flow patterns. The science here is fluid displacement. By narrowing the path, you increase the velocity of the drip, much like a river speeding up through a canyon.
5. Blown Directional Veins
Place a large drop of paint on a flat surface. Use a compressed air canister or a simple straw to blow the liquid across the page. This overrides gravity with pneumatic force.
Mastery Tip: Keep the air source at a low angle (15 degrees) to the paper. This creates long, filament-style drips that mimic the look of marble veining or lightning bolts.
6. Salt-Crystallized Trails
While your drips are still glistening, sprinkle coarse sea salt onto the wet trails. The salt is hygroscopic, meaning it physically pulls the water (and the pigment) toward the crystals.
Mastery Tip: The size of the salt grain dictates the texture. Large crystals create "blooms," while fine table salt creates a "stardust" effect. This is a chemical reaction that permanently alters the pigment distribution on the paper.
7. Layered Transparency Veils
Wait for your first set of drips to dry completely. Apply a second round of drips in a contrasting color. Because watercolors are transparent, the areas where the drips overlap will create a third, secondary color.
Mastery Tip: This is the "Glazing" principle. Ensure the first layer is bone dry to prevent the new moisture from re-activating the old pigment, which would cause "bleeding" instead of "layering."
THE TECHNICAL LEDGER
Maintenance & Longevity: To prevent your masterpieces from fading, always use lightfast pigments (look for "ASTM I" on the tube). Once finished, apply a UV-resistant archival spray varnish. This seals the porous surface and protects the delicate edges of your drips from atmospheric moisture.
Material Variations: For a sustainable approach, try using handmade hemp paper. It has incredibly high tensile strength and handles heavy water loads without tearing. For a premium look, use Yupo paper; it is a synthetic, non-porous surface that allows the paint to sit on top, creating incredibly bright, glass-like drips.
The Correction:
- The Blob: If a drip becomes too wide, use a damp synthetic brush to "wick" away the excess moisture from the sides.
- The Stall: If a drip stops halfway, do not push it with a brush. Instead, use a spray mister from a distance to gently re-moisturize the path ahead of the drip.
- The Mud: If colors mix poorly, wait for it to dry, then use a soft eraser or a "magic sponge" to gently lift the top layer of pigment without damaging the paper grain.
Studio Organization: Store your completed drip works in acid-free glassine sleeves. Keep them horizontal in a flat file cabinet. Never store watercolor art in a humid basement; the moisture can trigger mold growth in the organic binders of the paint.
THE FINAL REVEAL
There is nothing quite like the moment you peel back the tape and see those crisp, vertical lines contrasting against the white space of the paper. Your art now possesses a sense of dynamic equilibrium. It looks like a frozen moment in time, a snapshot of liquid physics captured forever. The way the colors have settled into the valleys of the paper creates a tactile depth that you just can't get with flat washes. You have successfully turned a chaotic liquid into a structured, expressive masterpiece. Go ahead, run your finger over the dried trails; that subtle texture is the mark of a true maker.
STUDIO QUESTIONS
How do I stop my watercolor drips from fading?
Use professional-grade paints with high lightfastness ratings and finish the piece with a UV-protective fixative. Avoid hanging the artwork in direct sunlight, as ultraviolet rays break down the chemical bonds of the organic pigments over time.
What is the best paper for heavy drips?
Choose 300 GSM (140 lb) cold-pressed paper. The high ply count and internal sizing prevent the paper from warping or "pilling" when saturated with the heavy water volume required for long, continuous fluid watercolor drips.
Can I use a hair dryer to speed up the process?
Use extreme caution. The forced air can push the wet pigment in unintended directions, ruining your linear flow. If you must, use the lowest setting and hold it at least two feet away to maintain the structural integrity of the drip.
Why are my drips looking dull and chalky?
This usually indicates a low pigment-to-binder ratio or the use of student-grade paints with excessive fillers. Switch to artist-grade tubes and use distilled water to ensure no mineral buildup interferes with the clarity of the dried paint film.

