
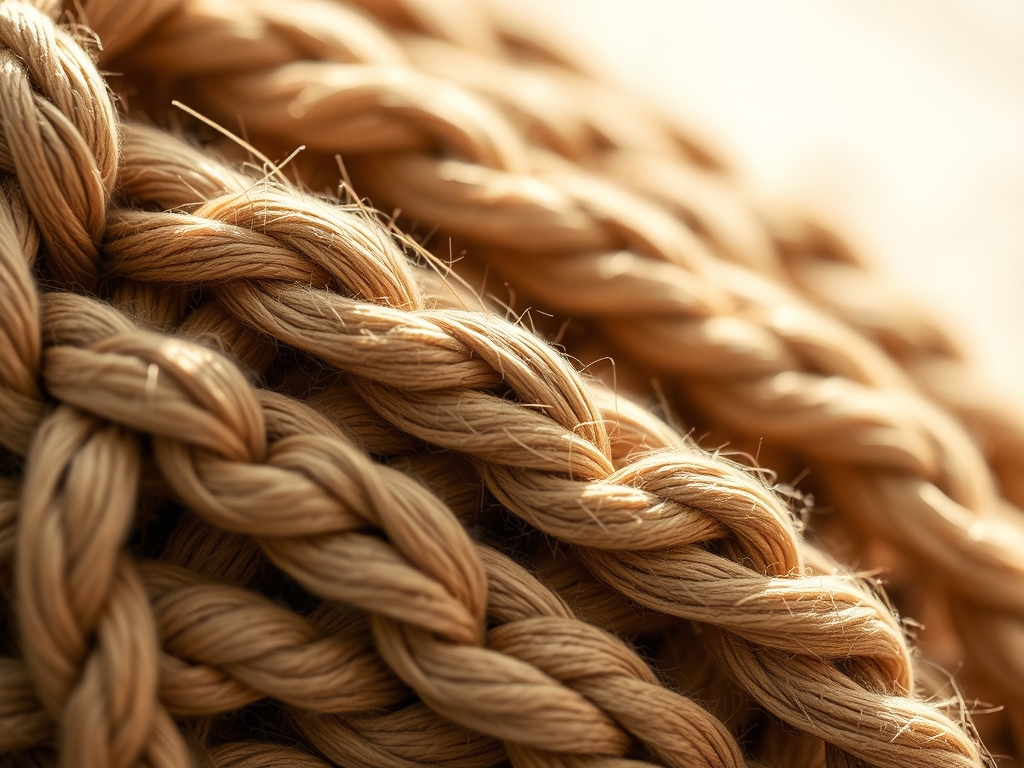
Grab your favorite heavy shears and clear the workbench because we are about to dive into the tactile magic of fiber physics. Imagine the raw scent of unwashed wool and the oily slide of jute between your fingers as you prepare to master Rhythmic Braiding Techniques. This is not your grandmother's hobby; it is a high-stakes game of structural integrity and tension management. When you handle eight distinct strands at once, you are essentially building a flexible bridge that must withstand years of foot traffic. The secret lies in the friction coefficients of your chosen fibers. If the strands are too slick, the braid collapses; if they are too coarse, they will grind against each other and fray. We are looking for that perfect "bite" where the fibers interlock under pressure. As you pull the first set of strands taut, you will feel the potential energy stored in the twist. This is the moment where raw material transforms into a functional masterpiece. Let's get our hands dirty and our minds sharp.
THE STUDIO KIT
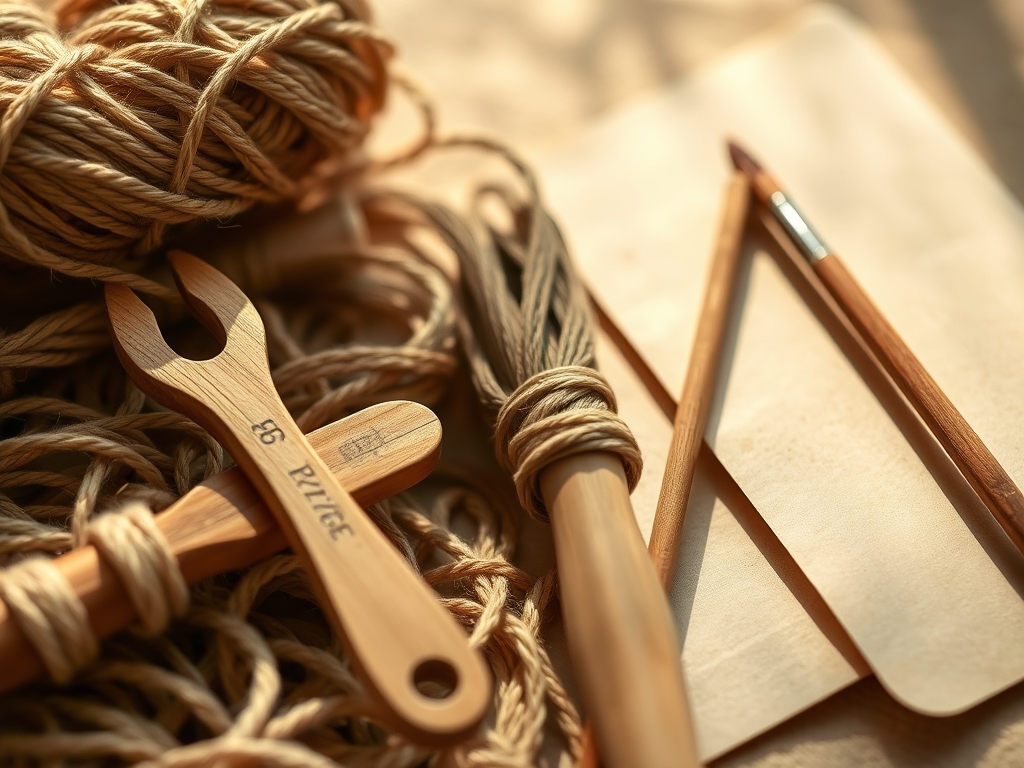
To execute these Rhythmic Braiding Techniques with professional precision, you need a kit that respects the physics of the craft. Start with a high-quality rotary cutter and a self-healing mat to ensure your eight strands are cut to an exact gauge. Inconsistency in strand width leads to "waisting," where the rug develops unsightly narrow sections. You will also need a heavy-duty stitching awl for piercing the dense core of the braid and a bone folder to burnish the edges of your fabric strips, reducing bulk at the turn-points.
For materials, look for high tensile strength fibers like New Zealand wool or industrial-grade cotton piping. Wool is naturally porous and resilient, meaning it can absorb impact without losing its structural memory. If you are looking for Material Substitutions, recycled denim strips offer incredible durability, though they require more hand strength to manipulate. Alternatively, sari silk provides a luxurious sheen but lacks the ply density of wool, so you might need to double up your strands to maintain the rug's thickness. Always keep a pair of calipers nearby to measure the diameter of your braid as you progress; consistency is the hallmark of a master maker.
THE TEMPO
Timing in rug making is less about the clock and more about the Maker's Rhythm. For an eight-strand project, you should allocate approximately two hours for material preparation, which includes stripping, folding, and winding your bobbins. The actual braiding phase follows a geometric progression; the larger the rug grows, the longer each "lap" takes. Expect to spend about ten hours of active braiding for a standard three-foot hearth rug.
The Maker's Rhythm is a state of flow where your hands move in a predictable cadence, maintaining a constant Newtonian force on the strands. If you break this rhythm, your tension will fluctuate, causing the rug to ripple or "bowl" rather than lying flat. Set a timer for forty-five minute intervals. This allows you to rest your hands and check the rug against a flat surface to ensure the structural integrity remains intact.
THE CORE METHOD
1. The Anchor and Alignment
Secure your eight strands using a heavy-duty clamp or a weighted "third hand" tool. Arrange them in a flat ribbon, ensuring no strands overlap at the base. This initial alignment determines the grain direction of the entire piece.
Mastery Tip: Use your bone folder to press the strands flat against the workspace. This reduces the void ratio between the fibers, ensuring that your starting point is as dense as the rest of the rug, preventing a "loose neck" at the center.
2. The Binary Cross-Over
Divide your strands into two groups of four. Take the outermost strand from the left and weave it over-under-over-under through the four strands on the right. Repeat this with the outermost strand from the right side, moving back toward the center.
Mastery Tip: This technique utilizes lateral friction to lock the strands in place. By alternating the weave, you are creating a series of miniature "nodes" that distribute weight evenly across the rug's surface, preventing localized wear.
3. Maintaining the Radial Curve
As the braid grows, you must begin coiling it into a spiral. Use your stitching awl to create pilot holes through the edges of the braids before lacing them together with a heavy-duty waxed thread.
Mastery Tip: This involves managing centripetal tension. You must slightly "over-feed" the outer edge of the braid as you turn the corner. If the outer edge is too tight, the rug will "cup" like a bowl; if it is too loose, it will "ruffle" like a skirt.
4. Tapering the Terminal Ends
When you reach the desired diameter, you cannot simply cut the strands. You must "skive" or thin out the ends of each strand using a sharp knife or rotary cutter, reducing the bulk density gradually over the last six inches of the braid.
Mastery Tip: Tapering allows for a "flush join." By reducing the cross-sectional area of the strands, you can tuck the tail under the previous row without creating a lump, maintaining the rug's aerodynamic profile and preventing a tripping hazard.
THE TECHNICAL LEDGER
Maintenance & Longevity: To ensure your rug lasts for decades, you must address the hygroscopic nature of natural fibers. Wool and cotton will expand and contract with humidity. Rotate your rug every six months to ensure even wear and sun exposure, which prevents the fibers from becoming brittle in one specific area.
Material Variations:
- Sustainable: Use reclaimed hemp rope for a rugged, high-friction finish.
- Recycled: T-shirt yarn (tarn) offers high elasticity but requires a tighter gauge to prevent sagging.
- Premium: Alpaca blends provide a soft tactile experience but have lower tensile strength, requiring a reinforced core.
The Correction:
- The Ripple: If the rug ruffles, your outer braid is too long for the inner circumference. Fix this by undoing the last row and increasing the tension.
- The Gap: Visible spaces between braids indicate poor lateral compression. Use your stitching awl to pull the braids closer together during the lacing phase.
- The Twist: If the braid itself is spiraling, you are applying uneven torque. Ensure you are pulling each strand straight toward your body, not at an angle.
Studio Organization: Store your ongoing project flat. Never roll a partially finished rug, as this can set a permanent "curl" into the fibers. Keep your strands on individual bobbins to prevent tangling and abrasion during storage.
THE FINAL REVEAL
Stand back and look at that geometry! When you master Rhythmic Braiding Techniques, the result is a stunning, high-density textile that feels substantial and professional. The eight-strand weave creates a complex, herringbone-like pattern that catches the light and shows off the depth of your materials. Your finished rug isn't just a floor covering; it is a testament to your understanding of fiber physics and your dedication to the craft. The weight of the piece should feel balanced, and the surface should be firm yet welcoming to the touch. You have officially leveled up from a crafter to a maker.
STUDIO QUESTIONS
How do I prevent my hands from cramping?
Use ergonomic tools and maintain a neutral wrist position. Stretching your carpal ligaments every thirty minutes prevents strain. Focus on using your core and shoulders to provide tension rather than relying solely on your finger strength.
What is the best thread for joining the braids?
A heavy-gauge, waxed polyester or linen thread is ideal. The wax acts as a lubricant during the sewing process and then "sets" to provide a mechanical lock, ensuring the braids do not shift over time.
Can I mix different fiber types in one rug?
Yes, but you must account for different shrinkage rates. If you mix cotton and wool, pre-wash both materials to ensure they won't pull the rug out of shape during future cleanings.
How do I clean a high-density braided rug?
Vacuum regularly using a suction-only attachment to avoid agitating the fibers. For deep cleaning, use a pH-neutral cleanser and avoid over-saturating the core, as trapped moisture can lead to internal fiber degradation.

