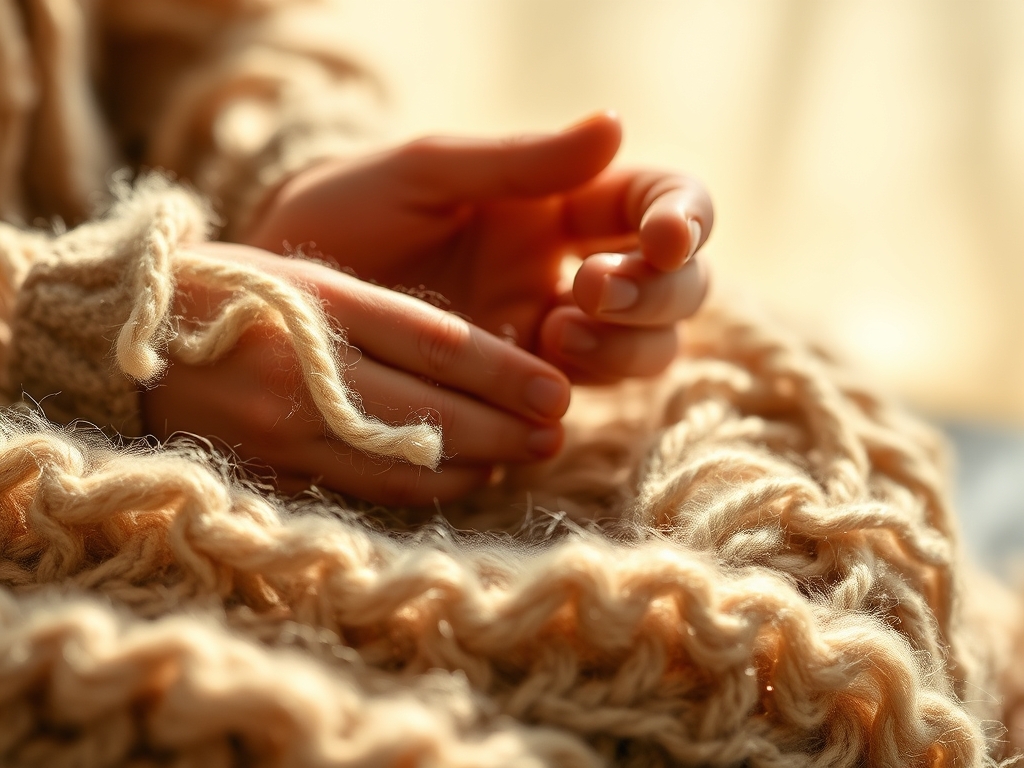
Pull that thread and feel the resistance of the cotton fibers locking into place. There is a specific, electric hum that happens when your needle pierces through three layers of high density textile; it is the sound of structural integrity meeting artistic intent. We are moving past the frantic pace of machine production to find your Hand Stitching Zen. This is not just about making a blanket; it is about the physics of the running stitch and the way a single strand of thread can manipulate the surface tension of a quilt top. When you slow down, you start to notice the microscopic friction between the needle and the weave. You are not just sewing. You are conducting a symphony of tensile strength and tactile precision. We are going to dive deep into the mechanics of the hand, the grain of the fabric, and the rhythmic pulse of the needle. Grab your favorite thimble and let us get into the beautiful, nerdy science of the slow stitch.
THE STUDIO KIT
THE STUDIO KIT
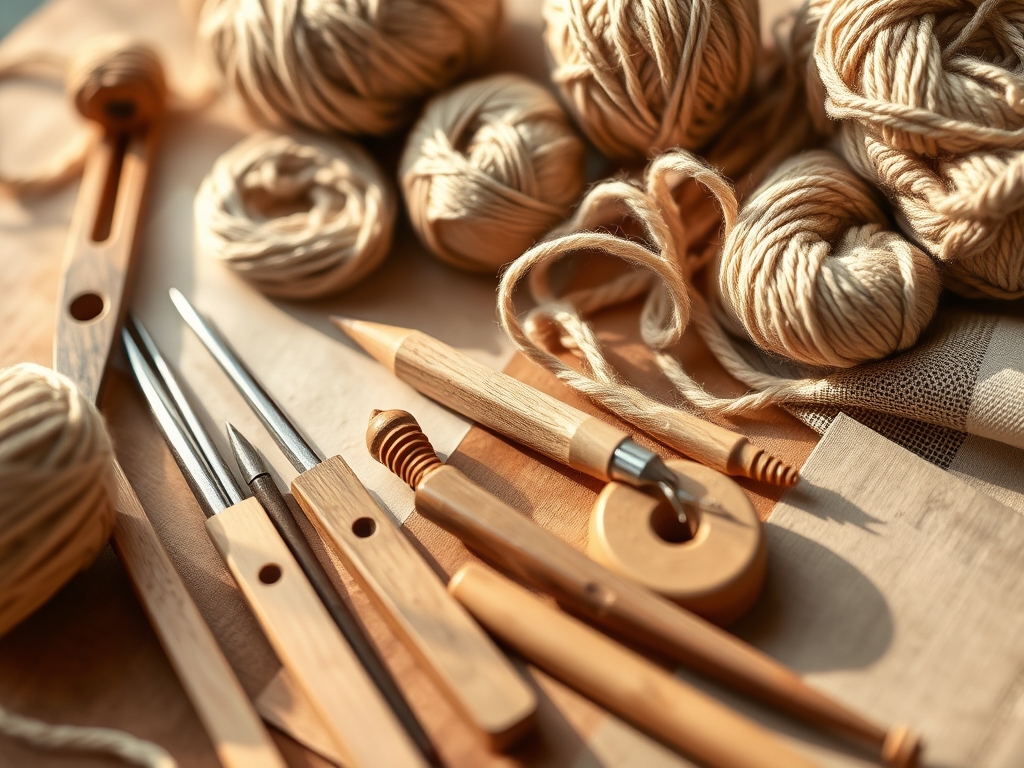
To achieve true mastery, you need tools that respect the laws of physics. Start with a Size 10 Big Eye Between needle. These are shorter than standard sharps, allowing for a quicker pivot point and less flex under pressure. For your thread, look for a 12wt or 28wt long-staple Egyptian cotton. The long-staple fibers ensure high tensile strength with minimal lint shedding, which prevents the thread from fraying due to the heat generated by repeated friction through the fabric layers.
Your fabric selection is the foundation of the project. A high-thread-count cotton lawn offers a smooth, non-porous surface that allows the needle to glide, whereas a linen-cotton blend provides a more tactile, rustic resistance. You will also need a rotary cutter with a fresh tungsten carbide blade to ensure clean, perpendicular edges that do not unravel during handling.
Material Substitutions: If you cannot find high-end cotton, look for recycled hemp blends. Hemp has incredible durability and a natural resistance to UV degradation. If a thimble feels clunky, try silicone finger protectors or leather pads; they provide the necessary grip to overcome the initial resistance of the fabric without sacrificing your fine motor sensitivity. Always keep a bone folder nearby to burnish your seams, ensuring the fibers are compressed and ready for the needle.
THE TEMPO
The Maker's Rhythm is a physiological state where your heart rate synchronizes with the movement of your dominant hand. For a standard lap-sized quilt, expect to spend approximately 15 to 20 hours in the stitching phase alone. This is broken down into 45-minute "sprints" followed by 10-minute ergonomic stretches to prevent carpal tunnel strain.
Phase one, the Layering and Basting, takes about two hours. This is the structural setup where you ensure the grain lines of all three layers are perfectly parallel. Phase two is the Stitching Core, where the bulk of your time is spent. Here, you will find your flow, aiming for approximately six to eight stitches per inch. The final phase is the Binding and Finishing, which requires about three hours of high-precision work. Remember, the goal is not speed; it is the consistent application of force and spacing that creates a professional, durable finish.
THE CORE METHOD
1. The Perfect Anchor Knot
Start by loading your needle with no more than 18 inches of thread. Any longer and the torsional stress will cause the thread to tangle and weaken. Create a "quilter's knot" by wrapping the thread around the needle three times and pulling it taut.
Mastery Tip: This knot relies on frictional interference. When you "pop" the knot through the top layer of fabric into the batting, you are hiding the anchor within the porous center of the quilt, ensuring the knot cannot migrate back through the weave.
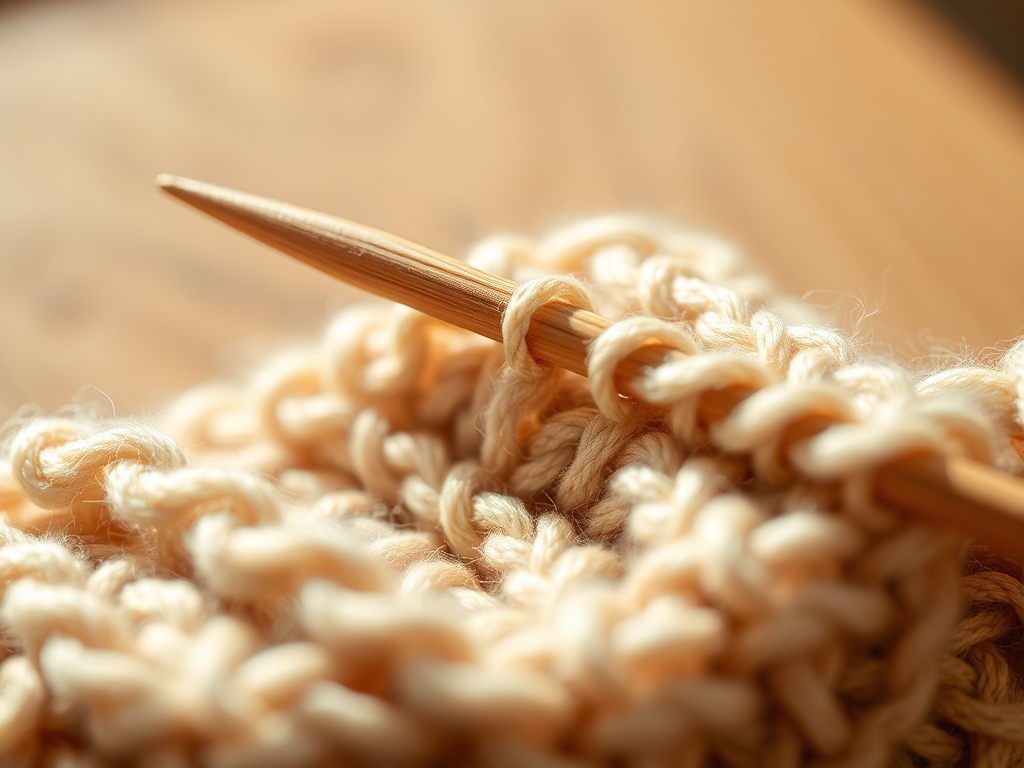
2. Establishing the Rocking Motion
Place your non-dominant hand underneath the quilt hoop to feel the tip of the needle. Use your thimble to push the needle down through all layers, then use your under-hand to nudge it back up. This creates a rhythmic "rocking" motion.
Mastery Tip: This technique utilizes lever mechanics. By using the thimble as a fulcrum, you minimize the force required to pierce the fabric, reducing hand fatigue and ensuring the needle enters at a 90-degree angle for maximum structural hold.
3. Managing Thread Tension
As you pull the thread through, stop just as the stitch sits flush against the fabric. If you pull too hard, you will cause puckering, which is a distortion of the fabric's lateral tension. If it is too loose, the stitch will snag.
Mastery Tip: Think of capillary action. A perfectly tensioned stitch allows the thread to sit within the "valley" of the fabric weave, protecting it from external abrasion and ensuring the quilt remains supple rather than stiff.
4. Navigating the Seam Intersections
When you hit a "bulk point" where multiple seams meet, the density increases significantly. Do not force the needle. Instead, use a slight twisting motion, similar to how a jeweler's saw cuts through metal.
Mastery Tip: This reduces the compressive load on the needle tip. By rotating the needle, you are finding the microscopic gaps between the woven threads rather than trying to punch through the fibers themselves, preventing needle breakage.
5. The Invisible Bury
To finish a thread, tie a small knot close to the fabric and "sew" it into the batting layer, bringing the needle out an inch away before clipping the thread.
Mastery Tip: This utilizes mechanical locking. By burying the tail within the batting, the friction of the polyester or cotton fibers holds the thread end in place, preventing the stitch line from unravelling even under heavy use or laundering.
THE TECHNICAL LEDGER
Maintenance & Longevity: To keep your hand-stitched masterpiece in top condition, avoid high-heat drying. Heat can cause the cotton fibers to become brittle, leading to "thread rot." Instead, air dry or use a low-tumble setting to maintain the elasticity of the stitches.
Material Variations: For a sustainable approach, use recycled wool batting. Wool has natural crimp and loft, which provides excellent thermal regulation and high "bounce back" memory. For a premium feel, silk thread offers a lustrous finish and incredible tensile strength, though it requires a more delicate touch during the stitching process.
The Correction:
- The Pucker: If the fabric bunches, you have over-tensioned the thread. Use a seam ripper to carefully snip the thread every three inches and re-stitch with a lighter touch.
- The Needle Grab: If the needle feels "sticky," it has likely accumulated microscopic oils or adhesives. Wipe it down with a microfiber cloth or use a strawberry emery sharpener to restore the smooth finish.
- The Ghost Mark: If your marking pen won't disappear, it is likely reacting to the acidity in the fabric. Use a 50/50 distilled water and white vinegar solution to neutralize the pH and lift the stain.
Studio Organization: Store your active project in a breathable cotton bag rather than plastic. Plastic can trap moisture and lead to mildew. Use a caliper to check the thickness of your batting before starting to ensure your needle gauge is appropriate for the depth of the material.
THE FINAL REVEAL
Look at that texture! The finished piece should have a gentle "ripple" effect, a hallmark of Hand Stitching Zen. When you run your hand across the surface, you should feel the rhythmic rise and fall of the stitches, a physical map of the hours you spent in the flow state. The edges are crisp, the tension is uniform, and the structural integrity is high enough to last for generations. You have successfully merged the laws of physics with the art of quilting. This is more than a craft; it is a high-energy achievement in textile engineering.
STUDIO QUESTIONS
What is the best needle for hand quilting?
A Size 10 or 12 Between needle is ideal. Its short length and narrow gauge provide the necessary leverage for quick, precise stitches through multiple dense layers while minimizing hand fatigue and fabric displacement.
How do I prevent my thread from tangling?
Use shorter lengths of thread, roughly 18 inches, to reduce torsional stress. Additionally, running the thread through a beeswax puck coats the fibers, reducing friction and preventing the static buildup that causes knots.
Why are my stitches uneven?
Uneven stitches usually result from inconsistent needle angles. Ensure you are piercing the fabric at a 90-degree angle. Practicing the rocking motion with a consistent fulcrum point on your thimble will help regulate stitch length.
Can I use polyester thread for hand quilting?
While possible, polyester is often too "stretchy" for hand work, leading to tension issues. Cotton thread is preferred because it has minimal stretch and matches the rate of expansion and contraction of cotton fabric during washing.